Use Case 1: Setting up a Private course repository
It is often handy to set up a repository for a course that you are teaching. This repository can contain demo code, assignment specifications, notes.. whatever you want. Remember a repository is just a a group of related files so you can use it to store your course content.
Using this method, you can set up a template for your course repository and spin the initial set of files each semester and save you time.
In this section of the notes, I will demonstrate how you can use github classroom to spin up a private course repository and provide access to your students.
Step 1: Create an "Assignment"
Remember that each assignment is just a repository creation link. even though its called an assignment doesn't mean its an actual assignment.
- Go to classroom.github.com and make a new assignment
- If you haven't created any assignments click the "create your first assignment" -> "Create a blank assignment" button/dropdown within the tile for the classroom you want to use
- otherwise click on name link for your classroom, then use the "new assignment button".
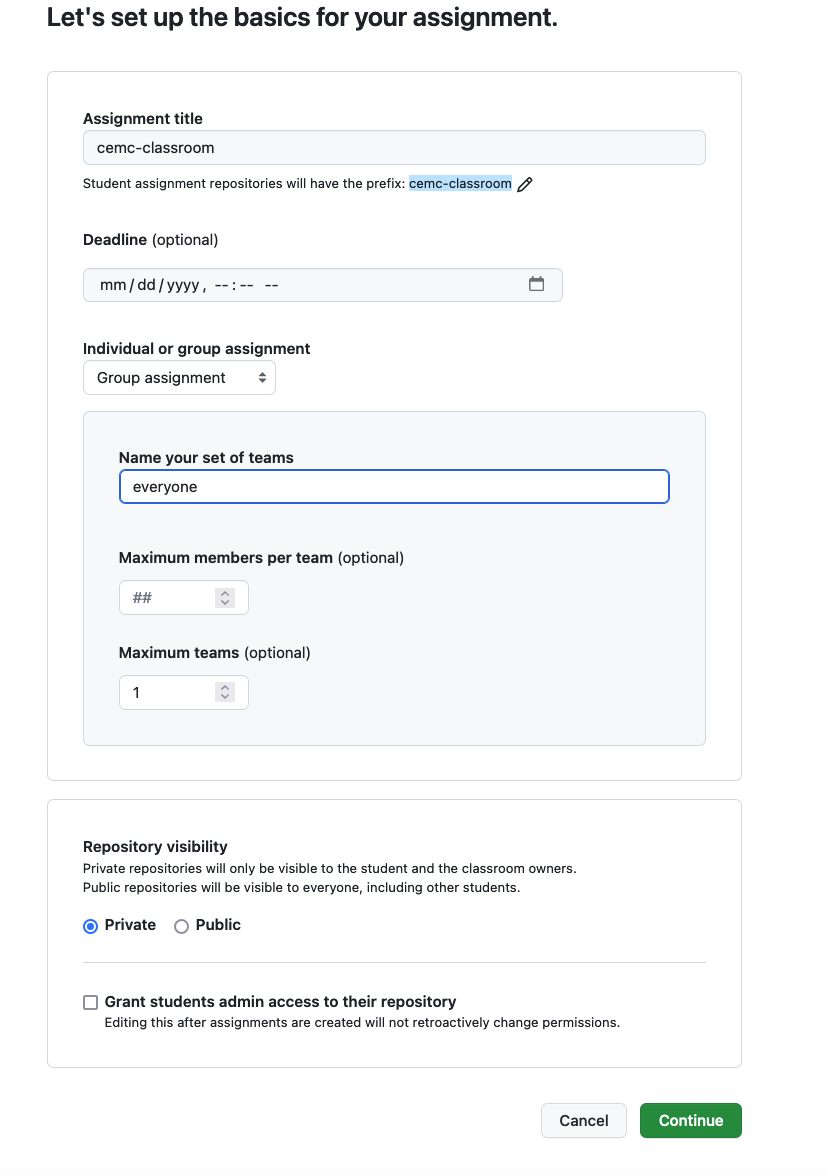
Step 2: Page one of assignment setup
- Give your assignment a title - this will be part of the name of the repo
- this assignment is being used to set up for a group repo for your course so the name should reflect this. For example, I like to use the course code to do this set up. You may prefer a fuller course name. This is really your choice but whatever you choose.. the url for this repo will be
https://github.com/your-organization-name/assignmentTitle-teamname. More on teamname in the next step
- this assignment is being used to set up for a group repo for your course so the name should reflect this. For example, I like to use the course code to do this set up. You may prefer a fuller course name. This is really your choice but whatever you choose.. the url for this repo will be
- Don't put in a deadline
- Choose Group Assignment
- Name your set of teams: Everyone
- Everyone in your class will have access to this repo so this is a good name.
- Maximum members per team: leave it at default ##
- Maximum teams: 1
- this ensures only 1 repository will be created.
- Repository visibility
- I prefer private.. if you like it to be public you can change this
- Do Not check the grant students admin access to their repositories...
- Hit continue
Step 3: Page two of assignment setup
In the "Add a template repository ..." box:
If you have a template for your course you can choose the template repository from the drop down list. If not you can leave this drop down list alone, but your repo will start off as blank. You can choose any template repository that you have access. This is my general course template... feel free to try it out for yourself: catherine-leung/CourseStart
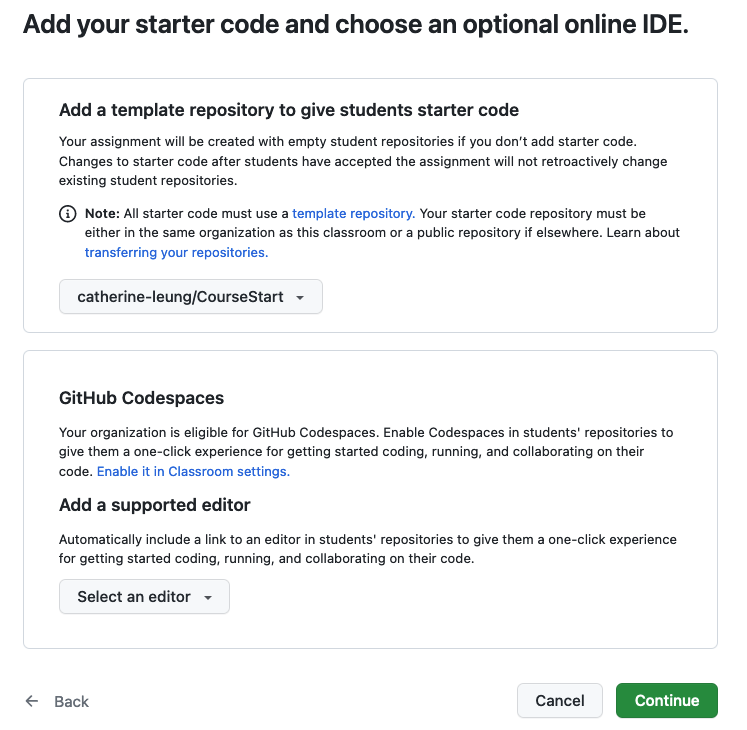
in the Github CodeSpaces box
This box is not nearly as exciting as it sounds. If codespaces are enabled you can use it without choosing it from drop down. In any case, recommend leaving this one alone.
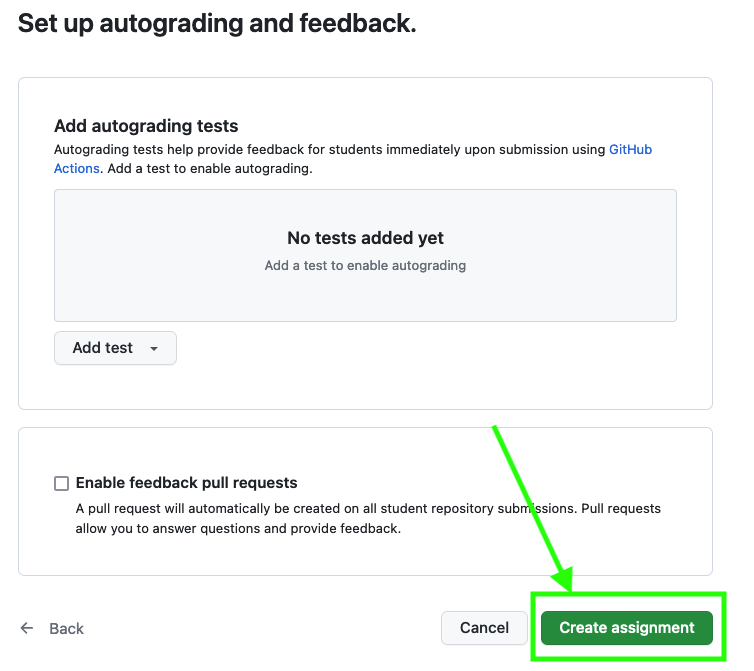
Step 4: Page three of the assignment setup
This page is for feedback and since this is your course repo, just leave everything as default and hit the Create Assignment button
Step 5: Accept the assignment
As this repo is used to provide files to students, you will need to create the one and only repo yourself before giving the link to students.
- Copy the link from the assignment page
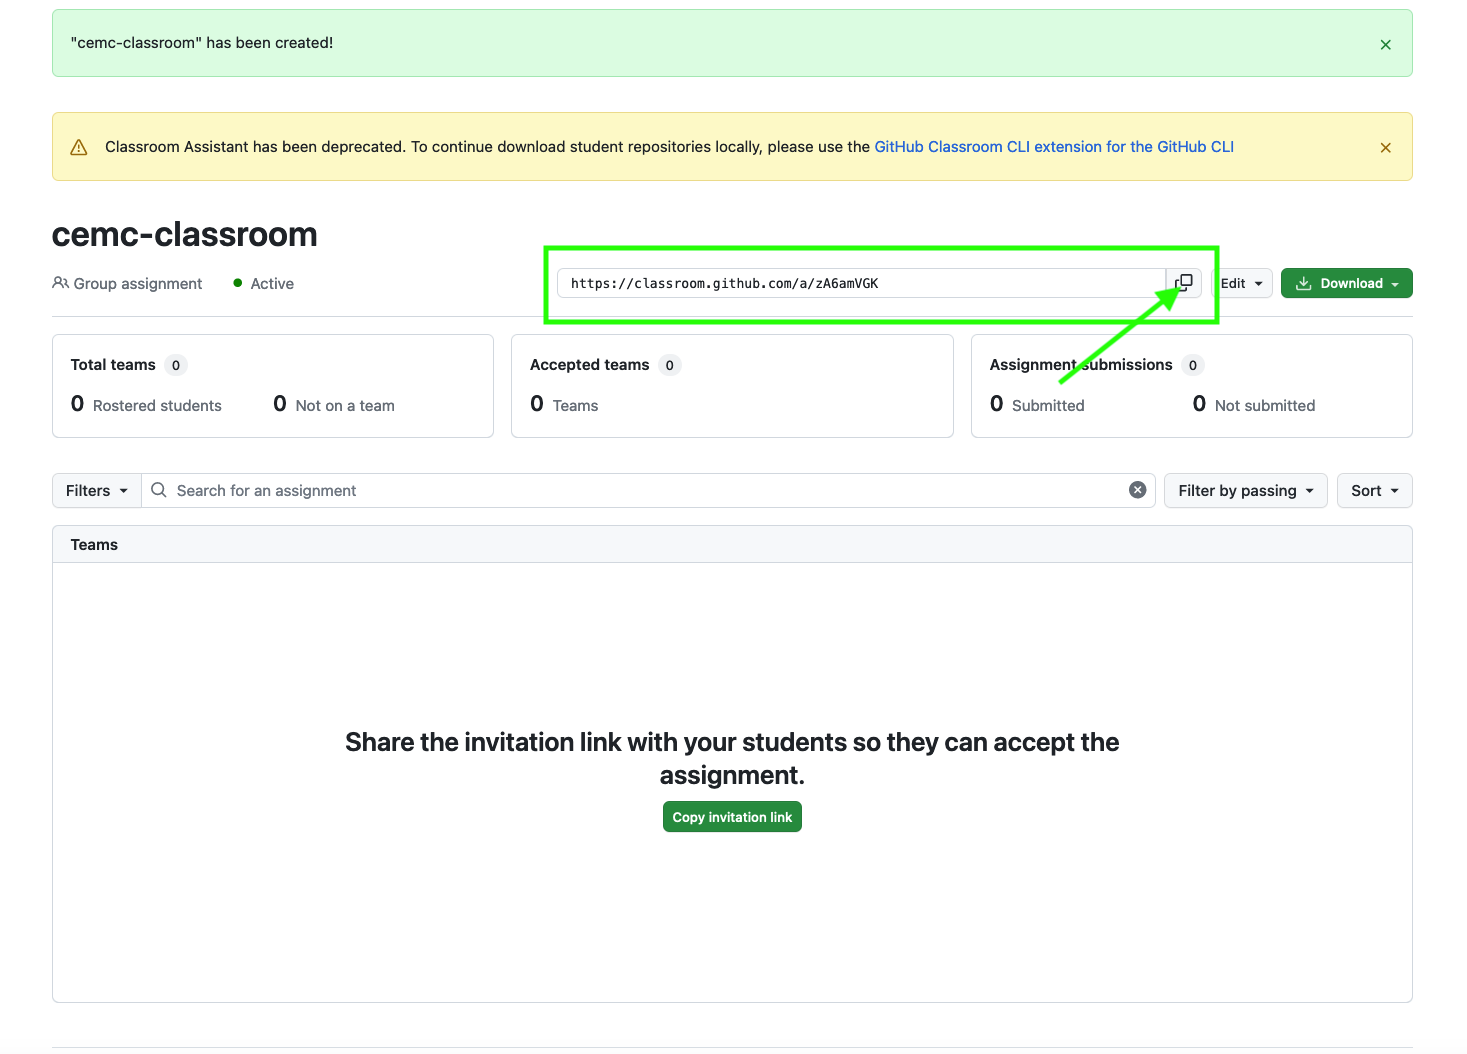
- Go to that link
- Provide a team name
- remember that the url created for this repo will be:
https://github.com/your-organization-name/assignmentTitle-teamname - for me I like to use the semester code ... like s23. Again, the exact name is up to you. This team name will be the second part of the repo url.
- remember that the url created for this repo will be:
- Hit the create team button
- On the next page hit the "accept this assignment" button.
- Note that depending on the permissions you have given to the classroom bot, it may ask you for permissions before getting to this step.
Step 6: Change permissions for the team!
You probably do not want to allow permissions to write into this repository. You will need to fix step manually.
- Go into the repo created for the course (you can click on link in last step of accepting the assignment)
- Go to Settings Tab -> Collaborators and teams
- In the drop down beside the team change the "Role: Write" to "Role: Read"
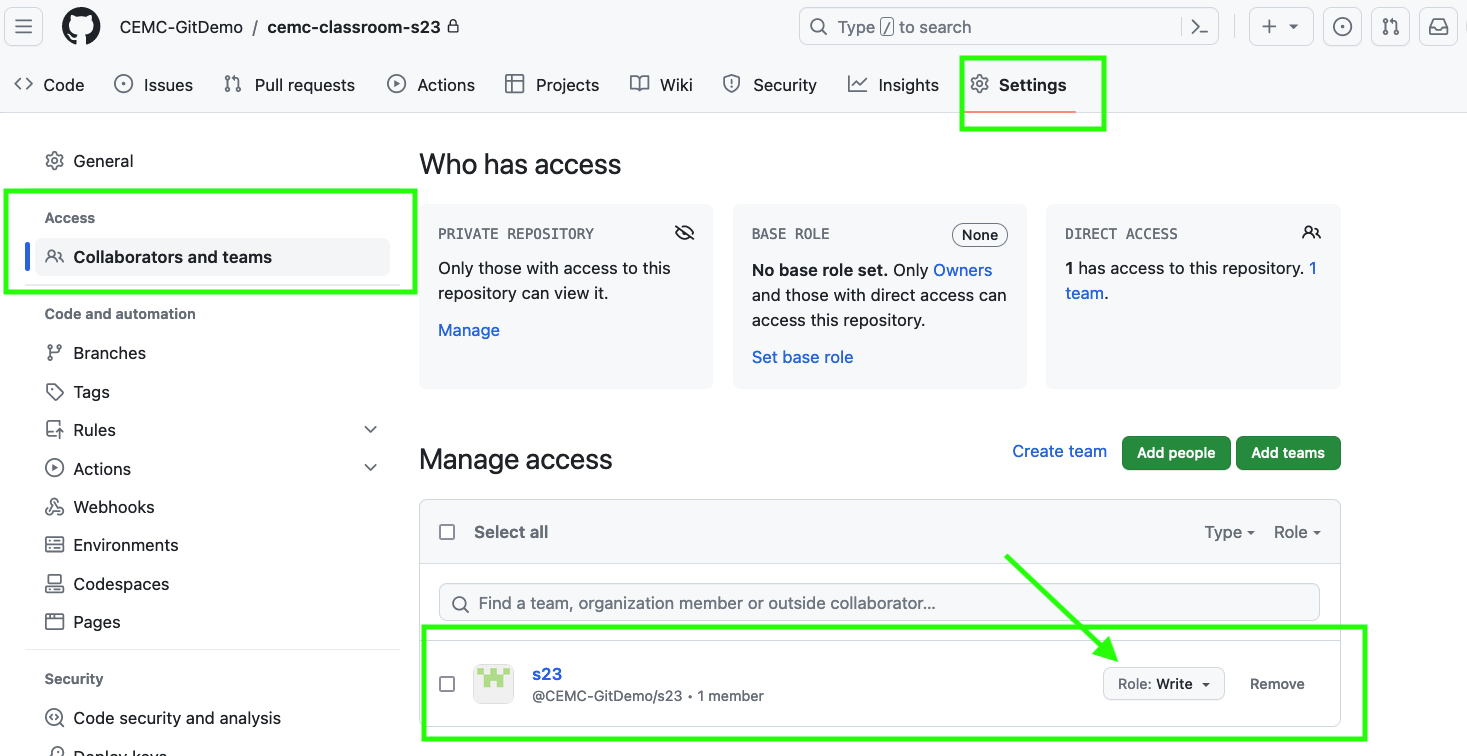
- As the owner of the organization you have full access to the repo. Students who use the assignment link to get into the repo will have to do so by joining the team and thus have only read access.
Step 7: Give link to students
Provide the link from the assignment page (the same one you used to accept the assignment)
- To find the link again, go back into your classroom and choose the link from the drop box beside the assignment
When students use the link they will see something like the image below. Have them hit the join button. Note how students cannot create another team. This is because of the way you had set up the "assignment":
Once they accept the assignment they will have read access to this private repository.