Lab 7 - Simple Storage Service (S3) Glacier
Overview
This week's lab will cover the following:
- Modifying the wordpress source code in preparation for Lab 8
- Creating a public Simple Storage Service (S3) bucket
- Uploading files to a Simple Storage Service (S3) bucket
Investigation 1: Wordpress Source Code Modification
Download and Unzip - Local Computer
- On your local computer, download the current Wordpress source code from here: https://wordpress.org/latest.zip
- Unzip the file. You should end up with a wordpress directory. (Do not delete the original .zip file)
Modify Wordpress Configuration File
Duplicate and Open Configuration File
- In the local wordpress folder, find a file called: wp-config-sample.php
- Duplicate this file, and call it: wp-config.php
- Open wp-config.php in a text editor. You will want something that supports syntax highlighting, such as Visual Studio Code.
Adding Database Connector Info as Environment Variables
In this file (wp-config.php), you will be adding database connector information as environment variables, not the actual connector information. (We'll add that information later.)
Find the following lines and add the bolded values:
- define('DB_NAME', getenv('DB_NAME'));
- define('DB_USER', getenv('DB_USER'));
- define('DB_PASSWORD', getenv('DB_PASSWORD'));
- define('DB_HOST', getenv('DB_HOST'));
Adding Authentication Unique Keys and Salts as Environment Variables
In the same file (wp-config.php), you'll be adding the authentication keys and salts as environment variables.
Find the following lines and add the bolded values:
- define('AUTH_KEY', getenv('AUTH_KEY'));
- define('SECURE_AUTH_KEY', getenv('SECURE_AUTH_KEY'));
- define('LOGGED_IN_KEY', getenv('LOGGED_IN_KEY'));
- define('NONCE_KEY', getenv('NONCE_KEY'));
- define('AUTH_SALT', getenv('AUTH_SALT'));
- define('SECURE_AUTH_SALT', getenv('SECURE_AUTH_SALT'));
- define('LOGGED_IN_SALT', getenv('LOGGED_IN_SALT'));
- define('NONCE_SALT', getenv('NONCE_SALT'));
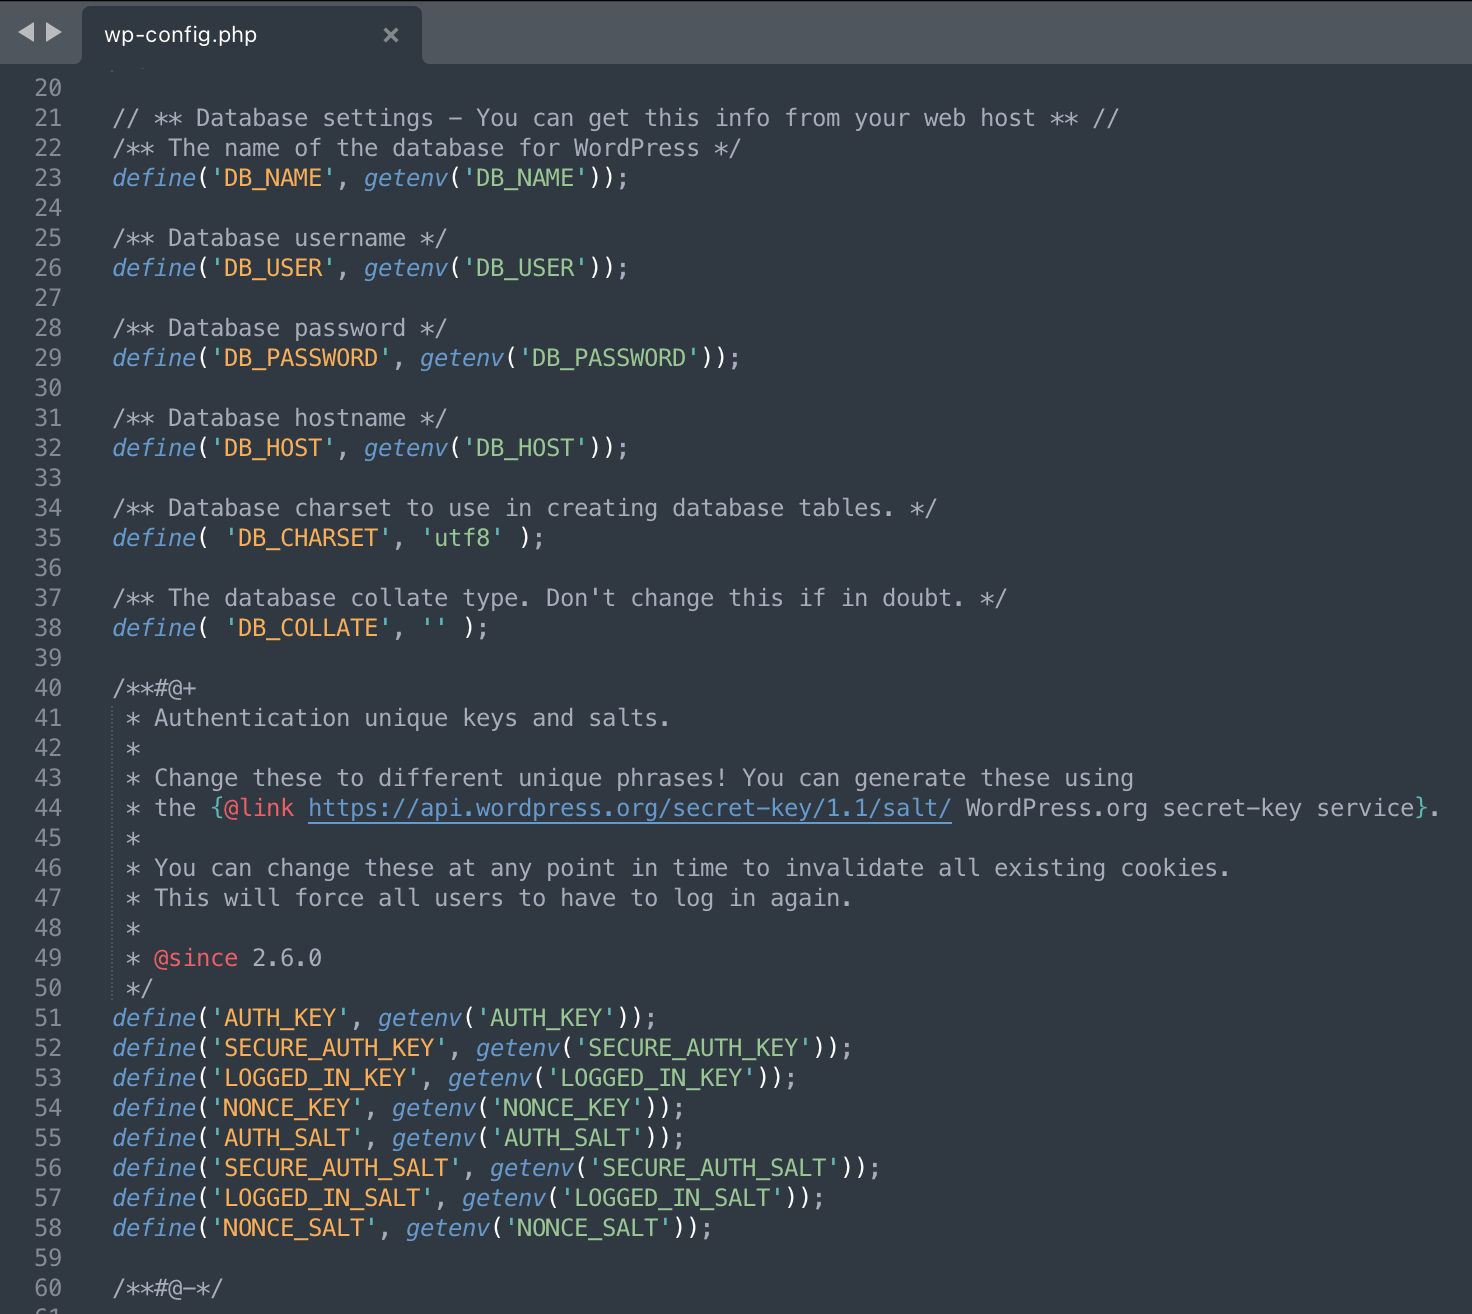 Figure 1: Adding database connector information to wp-config.php.
Confirm the values are correct and save the file.
Zip As New File and Rename - Local Computer
Warning: Make sure you only zip the wordpress directory, not the directory with the version number.
- Find the wordpress folder on your local computer.
- Zip the entire wordpress directory, not just the files inside. (Use the zip compression protocol. Don't use something else like .rar.)
- Rename your new zip file: wordpress-6.7.2-modded.zip (Use whatever version the source zip file has.)
Investigation 2: Creating an Simple Storage Service (S3) Bucket
Start your session in the Learner Lab by clicking on the Start Lab button. You are going to create an S3 bucket and upload your wordpress configuration files.
From the Console Home navigate to Storage > S3.
- Navigate to Amazon S3
- Click Create bucket
General configuration
- General purpose: selected
- Bucket name: senecausername-wordpress
Object Ownership
- ACLs disabled (recommended): selected
Block Public Access settings for this bucket
- Block all public access: unchecked
- I acknowledge that the current settings might result in this bucket and the objects within becoming public: checked
Bucket versioning
- Enable
Default encryption
- Accept the defaults
Bucket key
- Enable
Scroll down and click Create bucket
Once your bucket has created, click on your bucket's name (ie: candice-wordpress).
- Click Upload
- Click Add files
- Select your wordpress-modded zip file
Make note of the Destination location: ie: s3://candice-wordpress. You will need this for your next lab.
- Click Upload
Lab 7 Sign-Off (Show Instructor)
Take screenshots showing the following:
- Your S3 bucket
Exploration Questions
- What is S3?
- Describe the process of creating an S3 bucket as outlined in the lab instructions.