Lab 7 - Finalizing our Wordpress Website with RDS and AWS Elastic Container Service
Overview
This week's lab will cover the following:
- Creating a Relational Database Service (RDS) instance
- Connecting to your RDS
- Finalizing your Wordpress Website
- Building, running and deploying a simple web application using Docker containers locally
- Using Amazon Elastic Container Service (ECS) to manage a containerized application in the cloud.
In this lab, you will create a database using the Relational Database Service. You will then test connecting to it from your www instance. You will use this database in lab 8 to install and deploy Wordpress using Elastic Beanstalk.
Creating a RDS instance
Start your session in the Learner Lab by clicking on the Start Lab button. Once the red dot has turned green, click on it to enter the Learner Lab and access the AWS Console interface. You are going to create a new RDS instance.
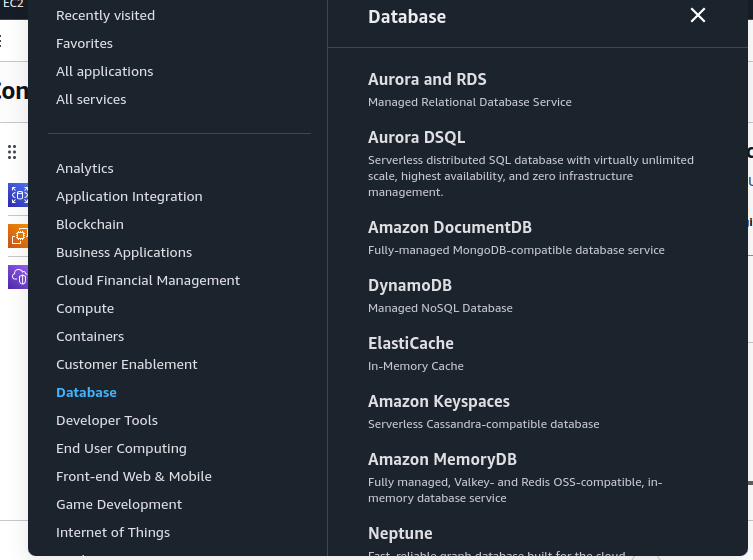
From the Console Home navigate to Database > RDS. See the following screenshot for reference.
Click Create database (part way down the screen). Use the following options.
- Standard create
- Engine type: MariaDB
- Engine Version: MariaDB 11.4.4
- Templates: Sandbox
- DB instance identifier: wordpress-db
- Master username: admin
- Credentials management: Self Managed
- Auto generate a password: Checked
- DB instance class: db.t3.micro
- Allocated storage: 20 GiB
- Enable storage autoscaling: Unchecked
- Virtual private cloud (VPC): Wordpress VPC
- DB subnet group: Create new DB Subnet Group (if you're redoing your database creation, there will already be an entry here. Make sure you're using the Wordpress VPC in the setting above!)
- Public access: No
- VPC security group: Choose existing
- Existing VPC security groups:
- Remove default VPC
- Add Wordpress Database SG (look to see that it's there below the dropdown after you select it)
- Availability Zone: us-east-1a
- Monitoring > Enable Enhanced monitoring: Unchecked
- Below the Monitoring section, Additional configuration > Initial database name: wordpress (Write the database name down! You will need this later.)
- Enable automated backups: Unchecked
- Enable encryption: Unchecked
Click Create database.
This will take a few minutes to create. Once the database has finished creating, click on the View connection details button by the green success message at the top of the page. This gives you your database password.
Store the following connection information about your RDS instance in your lab logbook or a saved document. You'll need it later:
- Endpoint
- Initial database name
- Master username
- Master password
Connecting to your database from www
Login to your www instance, update the system and install the mariadb client.
sudo apt -y update && sudo apt -y upgrade
sudo apt install mariadb-client-core
From your terminal, issue the following command to connect to your database. Be sure to substitute the credentials you wrote down earlier.
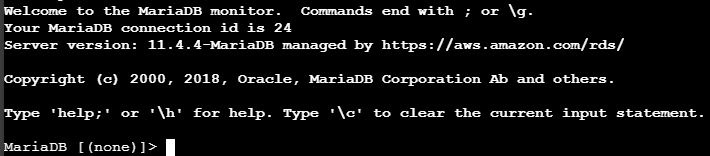
mysql -u admin -h **endpoint** -p
Enter your Master password when prompted. You should see the following screen indicating a successful connection.
Issue the following command to display the databases.
show databases;
Disconnect from the database.
quit;
Installing and Configuring Wordpress
Install Wordpress using apt.
sudo apt -y install wordpress
Create a virtual host file (using nano or vim) in /etc/apache2/sites-available/wordpress.conf with the following contents:
Alias /blog /usr/share/wordpress
<Directory /usr/share/wordpress>
    Options FollowSymLinks
    AllowOverride Limit Options FileInfo
    DirectoryIndex index.php
    Order allow,deny
    Allow from all
</Directory>
<Directory /usr/share/wordpress/wp-content>
    Options FollowSymLinks
    Order allow,deny
    Allow from all
</Directory>
Enable the new WordPress site
sudo a2ensite wordpress
- Use systemctl to restart the apache service.
Edit the file (using vim or nano) /etc/wordpress/config-www.username.mystudentproject.ca.php where username is your Seneca username. Add the following contents (changing values where appropriate).
<?php
define('DB_NAME', 'wordpress');
define('DB_USER', 'admin');
define('DB_PASSWORD', 'yourdbpassword');
define('DB_HOST', 'yourdbendpoint');
define('WP_CONTENT_DIR', '/usr/share/wordpress/wp-content');
?>
- Open a web browser and enter the following url: https://www.username.mystudentproject.ca/blog/wp-admin/install.php
- You should see a Wordpress Welcome/Setup page. Follow the prompts on screen and enter the appropriate information.
- Set the title to Your Name's Blog. For example: "Candice Carman's Blog"
- Set the username to your Seneca ID.
- Set the password to your Seneca ID. You may need to check the box to Confirm use of weak password
- Set the email to your Seneca email address.
- Click "Install Wordpress", you should see a "Success!" message.
Blog Post:
Add a blog post detailing the following:
- How did you find this lab?
- What was the most difficult part for you?
- What was the easiest part for you?
Shutting Down Your Database
The database you create in RDS will quickly eat through your $50 allotment if you are not careful.
!!!!!DOUBLE CHECK THIS!!!!! When you have completed this part of the lab and have taken the necessary screenshots (as listed at the end of this lab) it is a good idea to shut down and delete the database that you created. Be aware that this will break your Wordpress website and render it inaccessable. SO DO NOT DO SO UNTIL YOU HAVE TAKEN THE NECESSARY SCREENSHOTS!
Or you can temporarily stop the database if you need to come back to it using the steps below:
- Navigate to Aurora and RDS > Databases.
- Select the radio button beside wordpress-db
- Click on Actions > Stop temporarily
This will shutdown your database for 7 days and pause billing. You will need to repeat this every 7 days to prevent the database from eating your allotment.
Amazon Elastic Container Service
As we learned in lab 4, containers are lightweight, portable units that package an application and all its dependencies together, ensuring that the application runs consistently across different computing environments. We began by using local containers to get a sense of what they are and how they are used.
Now we will configure and deploy a web application (another iteration of our Apache web server) using Amazon ECS, a fully managed service that makes it easy to run and scale containerized applications on AWS. This will help you understand the basics of containerization in AWS and how to leverage ECS for deploying and managing containers in a cloud environment.It will also show you how much quicker it can be compared to doing everything manually (as you have done from lab 5 until now).
Amazon ECS (Elastic Container Service) Configuration
Amazon Elastic Container Service (ECS) is a fully managed container orchestration service provided by AWS. It enables you to easily run, scale, and secure Docker containers on the AWS cloud without needing to manage your own container infrastructure. ECS supports both serverless (AWS Fargate) and server-based (EC2) compute options, allowing you to choose the best deployment model for your applications. With ECS, you can define how your containers should run, manage networking and security, and automate scaling and monitoring, making it easier to deploy and operate containerized applications in production environments. In this lab you will be using a serverless container deployment via AWS Fargate.
Now that you have a general idea of what ECS entails, you will learn how it works by manually setting-up an ECS Cluster, Service, and Task for our my-apache-app microservice.
- Start the AWS Academy Learner Lab and AWS Console. Search for Elastic Container Service.
- We'll need to define our Container definition, Task definition, Service, and Cluster, and we'll begin with the Task Definition.
Task Definition
The Task Definition defines how to run our container with ECS. Let's create one for our my-apache-app server:
- In the Amazon Elastic Container Service console, choose Task definitions in the left-hand menu
Task definition configuration
- Click the Create new task definition button and Create new task definition.
- In the Task definition configuration, give your new task definition a family name:
my-apache-app.
Infrastructure requirements
As we know from working with EC2, running an application in AWS requires compute resources (e.g., EC2 instances), and these need to be provisioned and set with sufficient resources. Previously we did this manually, but now we will use the managed Fargate service to handle our compute.
- Under Infrastructure requirements we specify the infrastructure computing needs for our task. We will be using AWS Fargate serverless compute and Linux/X86_64 for our Operating system/Architecture.
- The Task size, defines how much CPU and Memory to allocate. Accept the defaults.
- In terms of security, we need to define two different IAM Roles within our AWS account. First, the Task role specifies the rights that the container running within the task will have (e.g., to be able to access other AWS resources in our account); second, the Task execution role specifies what rights that the ECS cluster and infrastructure will have (e.g., to access resources like our ECR repo). Set both of these roles to the pre-defined LabRole AWS Role, which will grant them access to any resources we own.
Container - 1
Next we define the container (or containers if running multiple), that will be run in our task. This step is a bit like defining the options to pass to docker run on the command line.
- For the Container details, use a Name of
my-apache-app - For Image URI, use
public.ecr.aws/docker/library/httpd:latest - For the Port mappings, we'll use the production HTTP port,
80. This is the default configuration: Container port is80, uses theTCPProtocol, and that the App protocol isHTTP. You can leave the Port name empty. - For the Resource allocation limits, specify the amount of CPU,
1, and Memory,1for the Memory soft limit. This means your container will reserve512 MiBof RAM when it starts (a Hard limit would define the maximum memory allowed, which we won't set). - The default values for Logging are good. ECS will use the Amazon CloudWatch service to collect our container logs into a Log Group named
/ecs/my-apache-app. You should write this down for later, when you need to see the logs for your server. - The default values for Storage are sufficient.
Everything else should be good using the default configuration. You can now click the Create button (at the bottom).
Your my-apache-app Task Definition is now created, and you can inspect or edit it at any time by coming back to Amazon Elastic Container Service > Task definitions > my-apache-app. When you do make changes, a new version will be created (i.e., this first version is Revision 1, my-apache-app:1).
Investigation 3: Creating a Cluster
Next we need to create a cluster where we can run our task.
- On the left side navigate to Clusters
- Click the Create cluster button
- Use the default Cluster name.
- Under Infrastructure, choose AWS Fargate (serverless)
- The default settings are good for all other options
- Click the Create button
It will take a minute or two for the cluster to be fully created. Once it is, move on to create your Service.
Creating a service
The final step is to create a Service within our cluster. A service is responsible for deploying, managing, and monitoring our tasks (and the containers they run).
Click on the newly created cluster, then under Services, click the Create button.
Service Details
- For the Task definition, choose the Family we created in the previous steps,
my-apache-app, and the only Revision we have,1 (LATEST). Our service will use this task definition to create and manage our task for us. - Next, select the default Service name.
Environment
- For Compute options select Launch Type
- For Launch type select FARGATE
- For Platform version select latest
Deployment configuration
- We will use a Service type of
Replica, which allows us to run multiple, simultaneous versions of our task for high-availability. To start, we'll choose to set the Desired tasks to1(i.e., only run a single task with a single instance of our server). - Leave the rest of the defaults.
Networking
- Under VPC select Wordpress VPC
- Under Subnets make sure the following are selected (they should be by default)
- Public Subnet 1
- Public Subnet 2
- Private Subnet 1
- Private Subnet 2
Security Group
- Under Security group select Use an existing security group
- From the Security group name drop down menu check Wordpress Website SG and uncheck default
- Leave Public IP as Turned on to auto-assign a public IP to your tasks.
Click Create. It may take several minutes to create.
Viewing your Apache web page
- Go to EC2 > Network & Security > Network Interfaces
- You should notice a new interface with a description beginning with arn:aws:ecs:us-east-1:
- Check the box beside it
- Copy the Public IPv4 address and paste it in your web browser.
- You should see the default Apache web page, displaying the text It works!
In this lab you have created a container in Amazon ECS with the default Apache image. You will be using Elastic Beanstalk to deploy a Wordpress website in Lab 8. Elastic Beanstalk also uses containers, although it automates the process of creating and deploying them.
Lab 7 Sign-Off
Take screenshots showing the following:
- A successful connection to the database from your www instance.
- Your blog post
- Be sure to include the full URL in the screenshot
- The default apache web page (running in the container you built in ECS) accessed in a browser
- Be sure to include the full URL in the screenshot
Exploration Questions
- What is an RDS?
- Do you think containers could be used to deploy a website using WordPress, as we did earlier in this lab?
- What is the difference between running a container locally with Docker and running it on AWS ECS?
- What are the benefits of using AWS Fargate compared to managing your own EC2 instances?