Lab 8 - Simple Storage Service (S3) Glacier and Elastic Beanstalk
Overview
This week's lab will cover the following:
- Modifying the wordpress source code to prepare it for use in Elastic Beanstalk
- Creating a public Simple Storage Service (S3) bucket
- Uploading files to a Simple Storage Service (S3) bucket
- Creating a new RDS for use with Elastic Beanstalk
- Configuring Elastic Beanstalk
- Installing and configuring Wordpress
Investigation 1: Wordpress Source Code Modification
Before we get into Elastic Beanstalk, we are going to set up a basic Wordpress configuration and store it in a zip file. Then we will use the AWS Simple Storage Service (S3) to create a bucket and store our Wordpress configuration in it. This will allow us to easily launch Wordpress inside the Elastic Beanstalk once the environment is set up.
Download and Unzip - Local Computer
- On your local computer, download the current Wordpress source code from here: https://wordpress.org/latest.zip
- Unzip the file. You should end up with a wordpress directory. (Do not delete the original .zip file)
Modify Wordpress Configuration File
Duplicate and Open Configuration File
- In the local wordpress folder, find a file called: wp-config-sample.php
- Duplicate this file, and call it: wp-config.php
- Open wp-config.php in a text editor. Using a tool that supports syntax highlighting, such as Visual Studio Code, will make this easier.
Adding Database Connector Info as Environment Variables
In this file (wp-config.php), you will be adding database connector information as environment variables, not the actual connector information. (We'll add that information later.)
Find the following lines and add the bolded values:
- define('DB_NAME', getenv('DB_NAME'));
- define('DB_USER', getenv('DB_USER'));
- define('DB_PASSWORD', getenv('DB_PASSWORD'));
- define('DB_HOST', getenv('DB_HOST'));
Adding Authentication Unique Keys and Salts as Environment Variables
In the same file (wp-config.php), you'll be adding the authentication keys and salts as environment variables.
Find the following lines and add the bolded values:
- define('AUTH_KEY', getenv('AUTH_KEY'));
- define('SECURE_AUTH_KEY', getenv('SECURE_AUTH_KEY'));
- define('LOGGED_IN_KEY', getenv('LOGGED_IN_KEY'));
- define('NONCE_KEY', getenv('NONCE_KEY'));
- define('AUTH_SALT', getenv('AUTH_SALT'));
- define('SECURE_AUTH_SALT', getenv('SECURE_AUTH_SALT'));
- define('LOGGED_IN_SALT', getenv('LOGGED_IN_SALT'));
- define('NONCE_SALT', getenv('NONCE_SALT'));
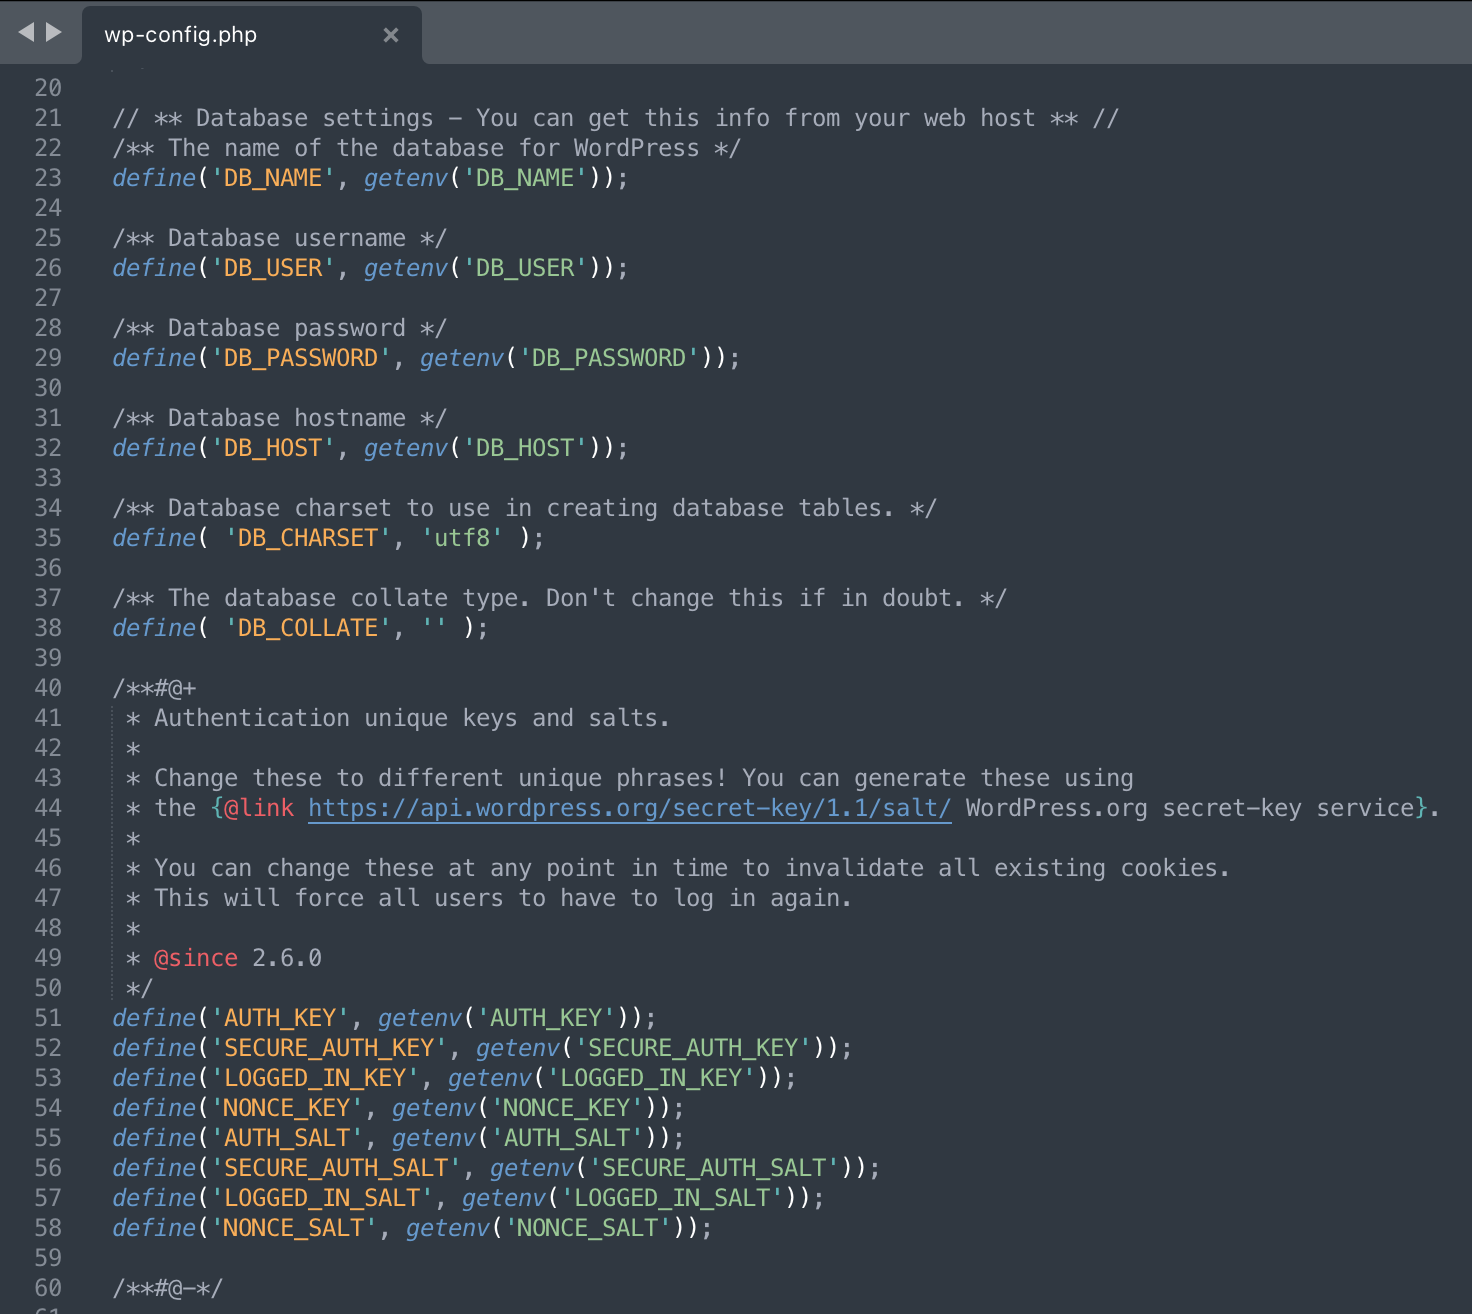 Figure 1: Adding database connector information to wp-config.php.
Confirm the values are correct and save the file.
Zip As New File and Rename - Local Computer
Warning: Make sure you only zip the wordpress directory, not the directory with the version number.
- Find the wordpress folder on your local computer.
- Zip the entire wordpress directory, not just the files inside. (Use the zip compression protocol. Don't use something else like .rar.)
- Rename your new zip file: wordpress-6.7.2-modded.zip (Use whatever version the source zip file has.)
Investigation 2: Creating a Simple Storage Service (S3) Bucket
Start your session in the Learner Lab by clicking on the Start Lab button. You are going to create an S3 bucket and upload your wordpress configuration files.
From the Console Home navigate to Storage > S3.
- Navigate to Amazon S3
- Click Create bucket
General configuration
- General purpose: selected
- Bucket name: senecausername-wordpress
Object Ownership
- ACLs disabled (recommended): selected
Block Public Access settings for this bucket
- Block all public access: unchecked
- I acknowledge that the current settings might result in this bucket and the objects within becoming public: checked
Bucket versioning
- Enable
Default encryption
- Accept the defaults
Bucket key
- Enable
Scroll down and click Create bucket
Once your bucket has created, click on your bucket's name (ie: candice-wordpress).
- Click Upload
- Click Add files
- Select your wordpress-modded zip file
Make note of the Destination location: ie: s3://candice-wordpress. You will need this in the next part of this lab.
- Click Upload
Now that we have our Wordpress config ready to go in our S3 bucket, we can move on to creating our Elastic Beanstalk environment.
Elastic Beanstalk Overview
When you have installed Wordpress previously, you simply uploaded the source code and the first time you load the webpage, provided the database connector information. However, Elastic Beanstalk applications are meant to be disposable.
Normally, when you add that database connector info, it is saved in a file called wp-config.php on the webserver VM. This is fine for a traditional setup. However, in Elastic Beanstalk, changes made to static HTML or PHP are not saved if the Beanstalk application restarts, which it will do often. Whenever the application restarts, it will reload from the source zip file and the original, empty connector file. If you did this the traditional way, you'd have to constantly re-enter your DB connector info every time you started up your Learner Lab environment.
We could add the DB connector info to wp-config.php manually before we upload the source code, but there's a much better way.
We use environment variables to allow us to put all the info in the Elastic Beanstalk application wizard directly. That way, every time the application restarts and reloads from the source code zip, it'll then read our saved connector information from AWS itself.
Note: All other information, like the Wordpress website name, users, theme settings, blog posts, etc., are saved in the actual database you created in RDS. This database does not get reset when the Elastic Beanstalk application restarts, so your actual blog data will remain intact.
Investigation 3: Creating a RDS instance
Start your session in the Learner Lab by clicking on the Start Lab button. Once the red dot has turned green, click on it to enter the Learner Lab and access the AWS Console interface. You are going to create a new RDS instance.
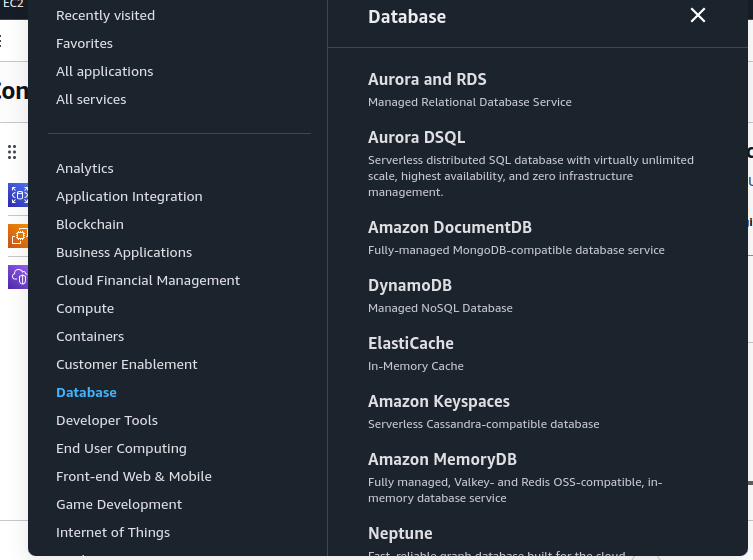
From the Console Home navigate to Database > Aurora and RDS. See the following screenshot for reference.
Click Create database (part way down the screen). Use the following options.
- Standard create
- Engine type: MariaDB
- Engine Version: MariaDB 11.4.4
- Templates: Sandbox
- DB instance identifier: wordpress-elasticbeanstalk
- Master username: admin
- Credentials management: Self Managed
- Auto generate a password: Checked
- DB instance class: db.t3.micro
- Allocated storage: 5 GiB
- Enable storage autoscaling: Unchecked
- Virtual private cloud (VPC): Wordpress VPC
- DB subnet group: Select the subnet group from Lab 5, it should be the auto selected one
- Public access: No
- VPC security group: Choose existing
- Existing VPC security groups:
- Remove default VPC
- Add Wordpress Database SG (look to see that it's there below the dropdown after you select it)
- Availability Zone: us-east-1a
- Monitoring > Enable Enhanced monitoring: Accept the default, should be turned off
- Below the Monitoring section, Additional configuration > Initial database name: wordpress (Write the database name down! You will need this later.)
- Enable automated backups: Unchecked
- Enable encryption: Unchecked
Click Create database.
Close the popup window.
This will take a few minutes to create. Once the database has finished creating, click on the View connection details button by the green success message at the top of the page. This gives you your database password.
Store the following connection information about your RDS instance in your lab logbook or a saved document. You'll need it later:
- Endpoint
- Initial database name
- Master username
- Master password
Connecting to your database from www
Login to your www instance, and issue the following command to connect to your database. Be sure to substitute the credentials you wrote down earlier.
mysql -u admin -h **endpoint** -p
Enter your Master password when prompted. You should see the following screen indicating a successful connection.
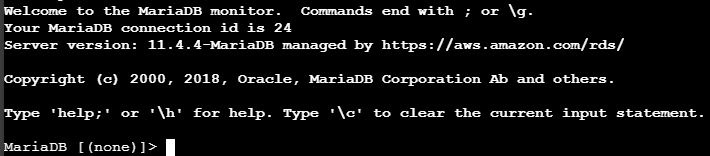
Issue the following command to display the databases.
show databases;
Make sure you see the "wordpress" database your created in step 19.
Disconnect from the database.
quit;
Investigation 4: Setting up an Elastic Beanstalk environment
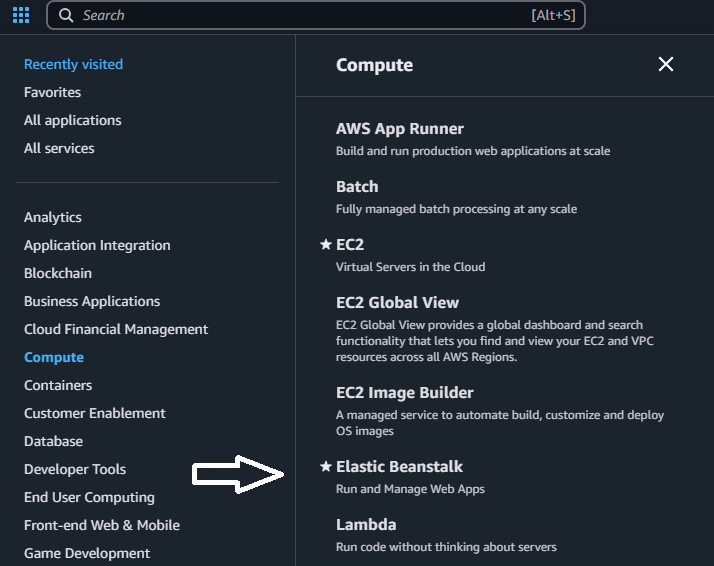
Navigate to Compute > Elastic Beanstalk. See the following screenshot for reference.
Click Create application, and use the following settings:
Environment Tier
Select: Web server environment
Application information
- Application name: wordpress
Environment information
- Environment name: Wordpress-env
Platform
- Ensure Managed platform checked
- Platform: PHP
- Platform branch: PHP 8.4 (or current latest)
- Application code: Upload your code
- Version label: wordpress-6.7.2 (Use the version from your zip filename)
- Public S3 URL: https://username-wordpress.s3.us-east-1.amazonaws.com/wordpress-6.8.1-modded.zip (Where username is your Seneca username)
Presets
- Presets: Single instance (free tier eligible)
Click next
Configure Service Access
Select: Use an existing service role
- Service role: LabRole
- EC2 instance profile: LabInstanceProfile
- EC2 key pair: vockey
Click next
Set up networking, database and tags
- VPC: Wordpress VPC
Instance Settings
- Public IP address Activated: Checked
- Instance subnets: Public Subnet 1, Public Subnet 2 (both checked)
Database settings
- Database subnets: Private Subnet 1, Private Subnet 2 (both checked)
Click Enable database
- Username: admin
- Password: The password you copied and wrote down earlier
Click next
Configure instance traffic and scaling
- EC2 Security Groups: Wordpress Website SG & Wordpress Database SG (both checked)
- Leave the rest default
Click next
Configure updates, monitoring and logging
Monitoring
- System: Basic
Managed platform updates
- Managed updates: Unchecked
Email notifications
- Email notification: Add your Seneca email
Platform Software
Before beginning this section, you will need two things:
- Your database connector information (you saved this, right?)
- Randomly generated auth keys and salts from here: https://api.wordpress.org/secret-key/1.1/salt/ (it's a good idea to save these in a text file, too)
Container Options
- Proxy server: Apache
- Document root: /wordpress
- Click Add environment property and add the following Environment properties
- DB_HOST: your RDS database URL
- DB_NAME: wordpress
- DB_USER: admin
- DB_PASSWORD: your auto-generated database password
- AUTH_KEY: (use gathered info from salt page)
- SECURE_AUTH_KEY: (use gathered info from salt page)
- LOGGED_IN_KEY: (use gathered info from salt page)
- NONCE_KEY: (use gathered info from salt page)
- AUTH_SALT: (use gathered info from salt page)
- SECURE_AUTH_SALT: (use gathered info from salt page)
- LOGGED_IN_SALT: (use gathered info from salt page)
- NONCE_SALT: (use gathered info from salt page)
Note: None of these values should have single quotes in them. (i.e. ')
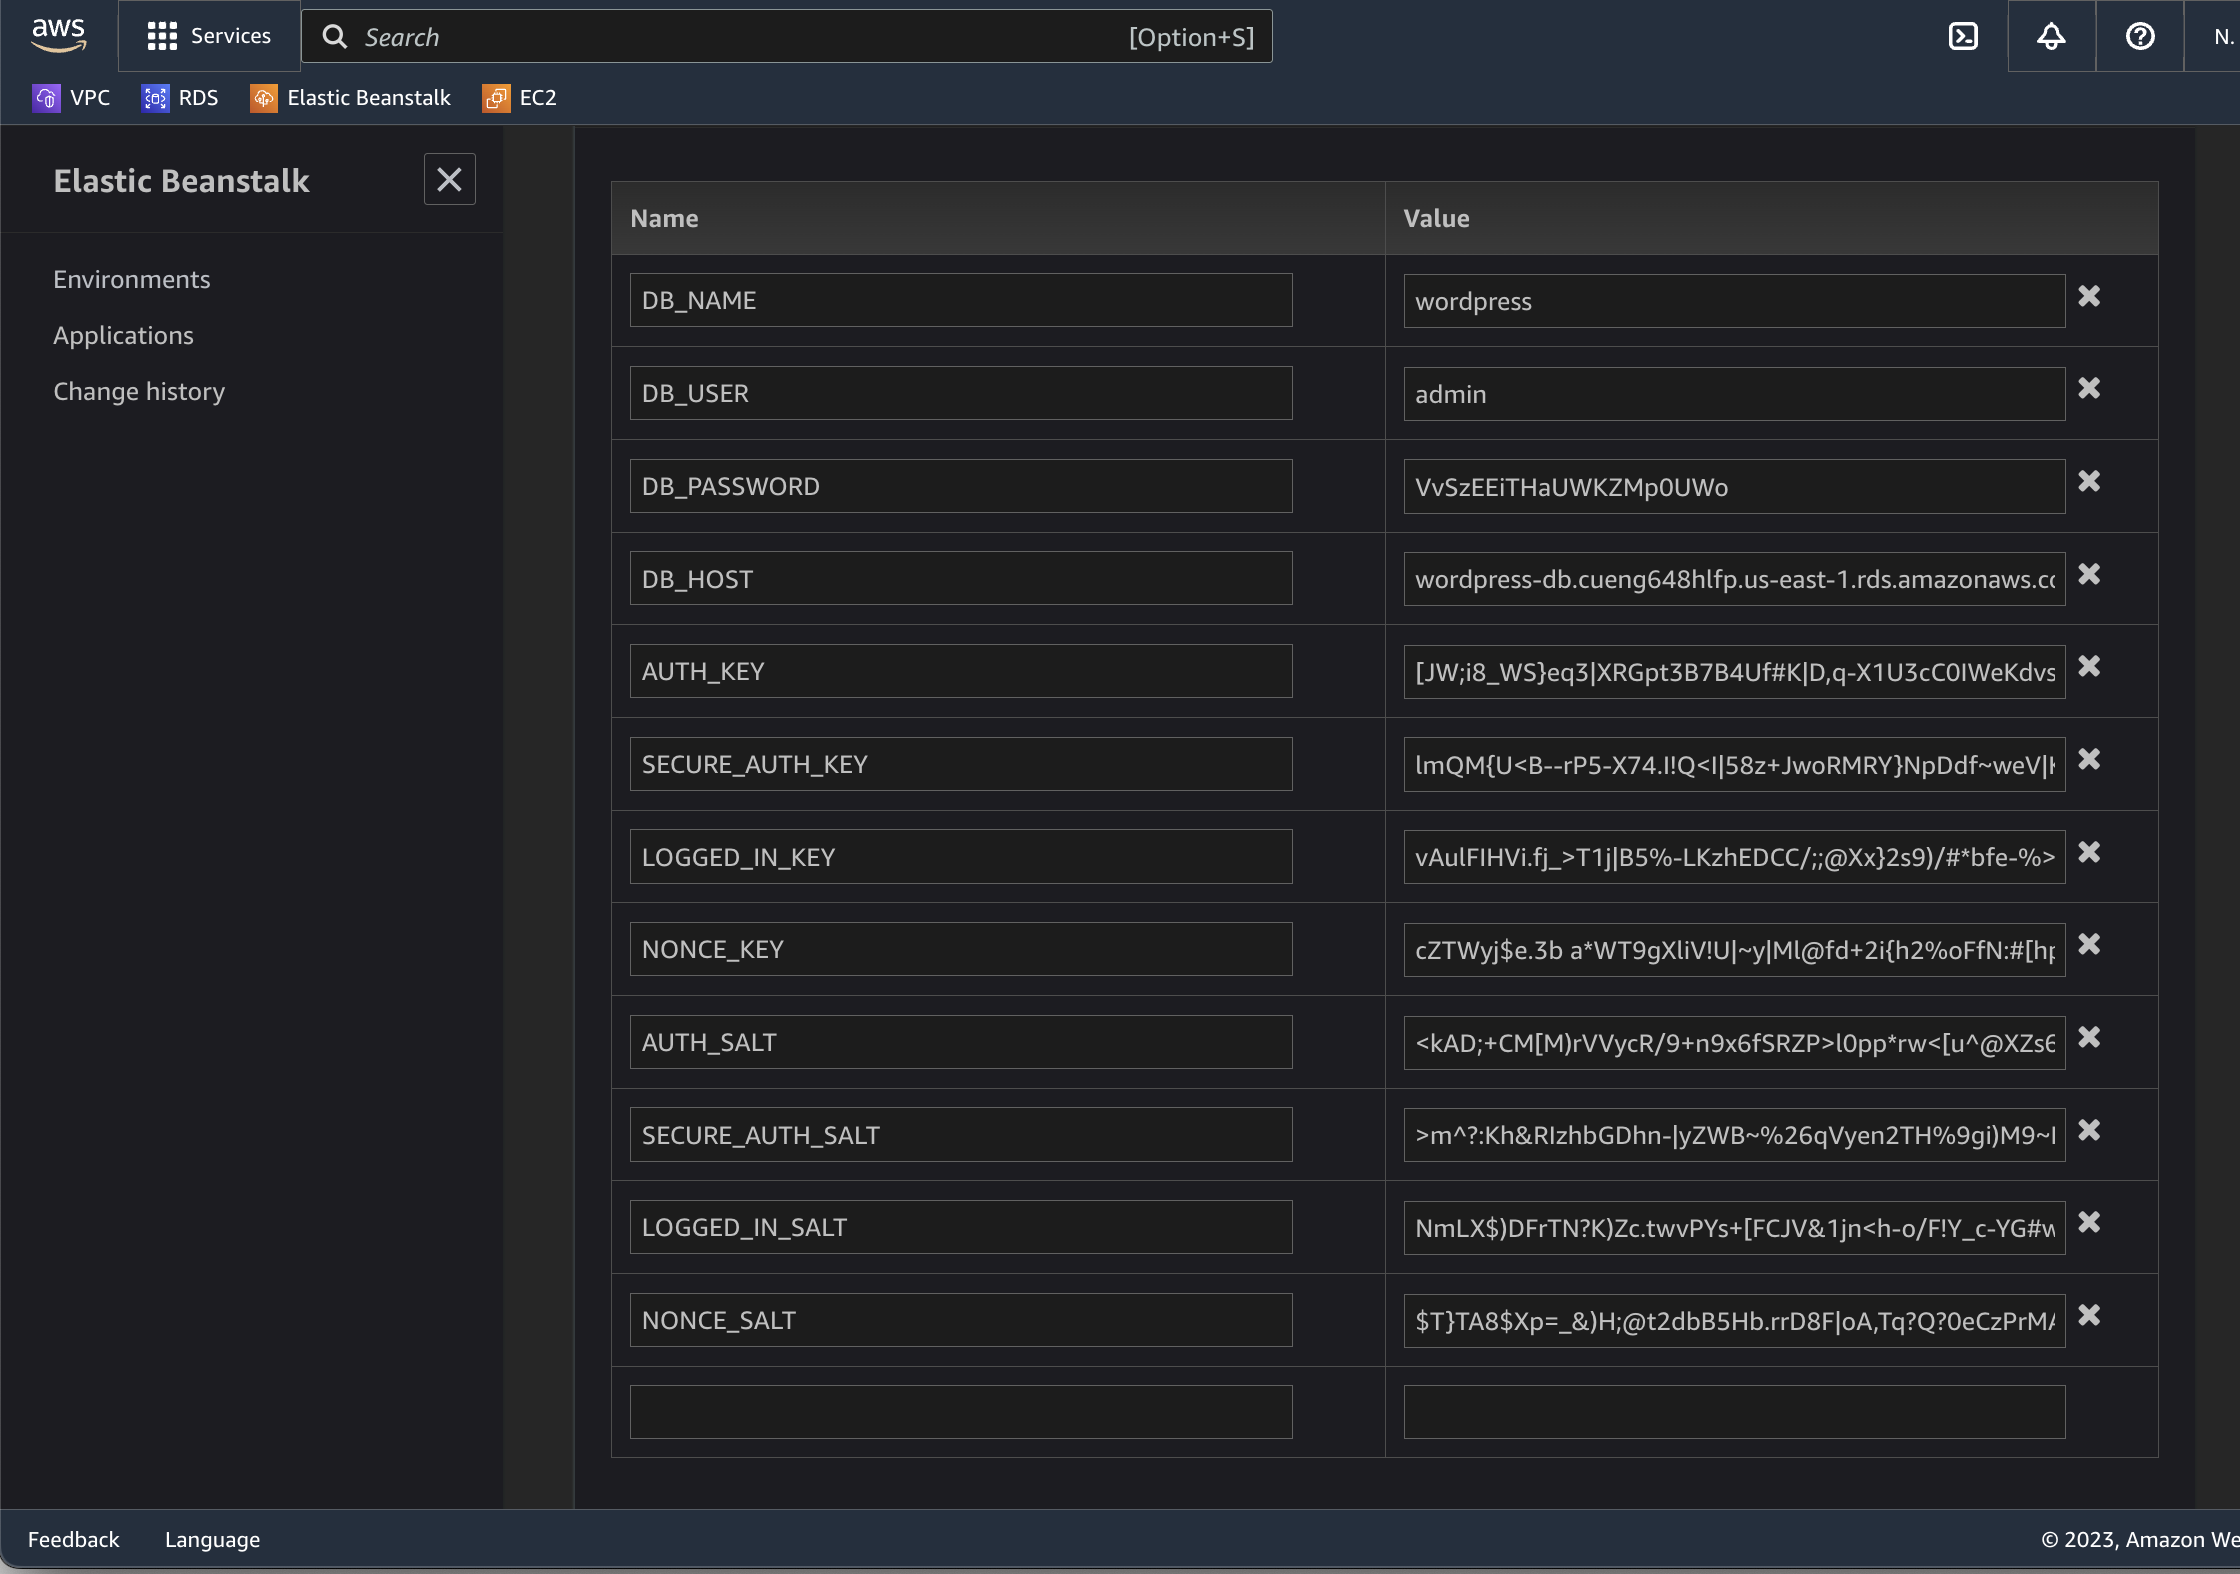 Figure 2: Adding database connector information, auth keys and salts to your Elastic Beanstalk application as static Environment Variables.
Click next.
Review options
Review all settings and ensure they match the instructions above. Once you hit Create, the application will take several minutes to create.
Create the application.
click Submit when ready.
While you wait for the creation to complete, check your e-mail to confirm your notification subscription.
If your application fails to build, double check your wp-config.php configuration file for syntax errors. Additionally, make sure when you rezipped the file you only select the wordpress folder, not the main folder.
Investigation 5: Accessing Wordpress
Open the URL presented in the Wordpress EBS instance and begin the site setup.
Site Information
Set the following site information:
- Site Title: Your name's blog
- Username: yourSenecaUsername
- Password: Choose a strong password (do not reuse the DB password!)
- Your Email: yourSenecaEmailAddress
- Search engine visibility: Unchecked
If you get a message indicating a failure to connect, make sure you zipped the wordpress folder and it's contents only. You can rezip the file and click Upload and deploy if necessary.
Blog Post:
Add a blog post detailing the following:
- What did you think of this lab?
- What was the most difficult part for you?
- What was the easiest part for you?
Lab 8 Sign-Off (Show Instructor)
Take screenshots showing the following:
- Your S3 bucket with your wordpress zip file in it
- Your blog post (including the URL in the browser)
Shutting down your database:
- Naviage to Aurora and RDS > Databases.
- Select the radio button beside wordpress-db
- Click on Actions > Stop temporarily
This will shutdown your database for 7 days and pause billing. You may need to repeat this.
Do not delete the database yet. You will need it to complete Assignment 2.
Exploration Questions
- What is S3?
- Describe the process of creating an S3 bucket as outlined in the lab instructions.
- What is Elastic Beanstalk?
- How is this lab similar to the wordpress install in Lab 6/7? How is it different?