Tutorial 1: Using Your Matrix Account
Main Objectives of this Tutorial
- Learn how to access your Matrix server account (from home and/or from Seneca computer lab).
- Learn several ways to exit your Matrix Linux Account session.
- Understand the Linux command structure and how to get help with Linux command usage.
- Become efficient with Linux command line editing by using short-cut keys.
- Issue a checking program (i.e. Shell Script) to confirm that you accessed your Matrix account.
- Perform LINUX PRACTICE QUESTIONS for additional practice.
Tutorial Reference Material
Lecture Slides:
Windows SSH client Software:
Matrix Account Access:
Command Line Editing:
General Linux Commands:
| pwd | cd | ls | cal | date | who , w | whoami, who am i | clear, <ctrl><l> |
|---|
KEY CONCEPTS
Purpose of Having a Matrix Linux Server Account
While attending Seneca Polytechnic, you will be using many different computer systems. Some of these servers include:
learn.senecapolytechnic.ca Learning Content Management System (Link to Resources / Student Grades / Online Quizzes)
OSL640 Lab site Student Notes / Tutorials / Practice Questions / Resources
matrix.senecapolytechnic.ca Linux Account for "hands-on Practice" and Assignment submission
Although you need to study concepts throughout this course (slides, etc.), you will also need to get hands-on practice running Linux commands as well as performing and submitting online tutorials.
This requires that you connect to a Linux server (Matrix) and become comfortable issuing Linux commands.
In Unix/Linux, a shell is simply an interface to allow a user to communicate with the Linux computer system (server). Linux shells have evolved (improved) over a period of time. You will be using the Bash Shell which is considered to be user-friendly. By understanding how to issue Linux commands, you can create a file that contains Linux commands (called a shell script) later in this course to automate tasks to make you a more productive Linux user and system administrator.
Layout of the Matrix Linux Server
The Matrix server consists of several computers connected together to form a cluster. A Linux cluster is a cost effective alternative to buying larger servers.

All registered students in this course should have an account on the Matrix server. You will be using this account for the following reasons:
- Issuing Linux commands
- Becoming productive using the Linux command prompt (shell)
- Performing Linux Practice Tutorials (12)
- Performing Linux Practice Questions
Connecting to the Seneca GlobalProtect Student VPN
All Seneca Polytechnic students are required to connect to the Seneca GlobalProtect Student VPN in order to be able to connect to their Matrix Linux account.
Multi-factor authentication is an electronic authentication method in which a computer user is granted access to a website or application only after successfully presenting two or more pieces of evidence (or factors) to an authentication mechanism: knowledge (something the user and only the user knows). Reference: https://en.wikipedia.org/wiki/Multi-factor_authentication_
You should have received an e-mail message with instructions (also available in course announcements) on how to set up your Smart Phone for multi-factor authentication to connect and validate via the Seneca GlobalProtect Student VPN. NOTE: If you haven't installed it yet, please do so by following the ITS instructions here: https://students.senecapolytechnic.ca/spaces/186/it-services/wiki/view/1024/vpn
In the next investigation, you will learn how to connect to and login to your Matrix server account from a remote computer such as your home desktop computer, laptop or tablet computer.

Seneca Student VPN
Connecting to Your Matrix Account
After connecting to the Seneca GlobalProtect Student VPN, you can open a command terminal in your Newer Windows 10, Mac or Linux computer and issue the following command:
ssh senecauserid@matrix.senecapolytechnic.ca
You can also click on the following link to download and install a graphical SSH application for your Windows machine: http://www.sfsu.edu/ftp/win/ssh/SSHSecureShellClient-3.2.9.exe
Investigation 1: Accessing Your Matrix Linux Account
ATTENTION: The due date for successfully completing this tutorial (i.e. tutorial 1) is by July 5 @ 11:59 PM (Week 8).
It is essential that you complete these Weekly Tutorials fully and on time. These are your major learning tool in the course. There are no late marks.
In this investigation, you will learn how to connect and login to your Matrix account by issuing a command from your computer's text-based terminal and/or by downloading, installing a running a graphical Windows SSH graphical application.
Connecting To Your Matrix Account From A Command Line Terminal
You will now learn a quick and simple method of connecting to your Matrix account by opening a text-based terminal (in any OS) and issuing the ssh command.
Perform the Following Steps:
Before proceeding, you MUST first connect to the Seneca GlobalProtect Student VPN. Make certain that your Seneca Student VPN is connected.
NOTE: If you haven't set this up, refer to the following link for instructions; https://students.senecapolytechnic.ca/spaces/186/it-services/wiki/view/1024/vpn
NOTE: You only have to connect to your Seneca student VPN once during the day, or while you are logged into your computer.
The Seneca Student VPN service must be connected.
Determine which operating system that your computer is using.
Try connecting to your Matrix account using the instructions below based on your current operating system.
Newer Version of Windows 10 (or above):
- From the start menu, type
cmdand launch program - In the command terminal, enter the following command:
ssh senecausername@matrix.senecapolytechnic.ca
macOS:
- Click Launchpad icon, type terminal and press ENTER
- In the terminal, enter the following command:
ssh senecausername@matrix.senecapolytechnic.ca
Linux:
- From the menu, choose: Applications > System Tools > Terminal
- In the terminal, enter the following command:
ssh senecausername@matrix.senecapolytechnic.ca
When connecting securely for the first time, a dialog box will appear to share a "public key" with your Matrix account in order to make your interaction between your workstation and the remote Linux server secure within the network (i.e. encrypted to prevent unauthorized access by other users)
- FYI: To make communications over a network secure, a computer generates two keys: a private key that is kept on the computer, and a public key, which can be shared with other computers. Transmissions from your computer uses the private key to encrypt (scramble) transmission to the remote computer, which in turn, uses the public key to decrypt (unscramble) the transmission. Likewise, the remote computer uses the public key to encrypt (scramble) transmissions and your computer uses the private key to decrypt (unscramble) those transmissions.
Type yes and press ENTER to share your public key.
- Next, a dialog box will appear prompting you for your Matrix account password in order to gain entry to your Matrix account. Your Matrix password is identical to your Seneca password. As you type the password, the text may be hidden to prevent others from viewing your password
Enter your Seneca password and press ENTER
NOTE: If you encounter an error message, this can occur for several reasons:
- You mis-spelled the name of the server
- You mis-spelled your Matrix username (same username that you connect to my.senecapolytechni.ca)
- You have CAPS LOCK on by mistake (your username should be lowercase only).
- You mis-spelled your password (same password that you connect to my.senecapolytechnic.ca)
- If you continue to experience the same problems, click on the following link for IT service desk contact info: IT service desk
If you entered your password correctly, the Matrix Linux shell should appear where you can enter Linux commands.
- The Matrix server has been configured to allow users to only interact with the Linux OS by issuing commands.
- The main reason for this is to force students to learn how to issue Linux commands.
To exit your Matrix session, type the command
exitfollowed by ENTER- NOTE: You should notice that you are returned to the original command prompt where you issued the ssh command.
Type the same command at the command terminal prompt:
exitfollowed by ENTER- NOTE: You should notice that the you are disconnected and that the original terminal window has automatically closed.
Try accessing your Matrix account, and then exiting your Matrix account several times to become familiar with this process.
- You will now learn an alternative method to access your Matrix account (if you have an MS Windows machine) by downloading and running a graphical SSH application.
Connecting To Your Matrix Account From A Graphical Windows Application
You can also install and run a free MS Windows graphical SSH application in order to connect to your Matrix account. You may find it useful when running a graphical SSH application to copy and paste text. There are several applications that you can download and install, but we will be using the SSH Secure Shell Client application for this tutorial.
Perform the Following Steps:
Click the following link to download and install the free SSH Secure Shell application on your Windows computer: http://www.sfsu.edu/ftp/win/ssh/SSHSecureShellClient-3.2.9.exe
- NOTE: If you can't download or run this link, check to see if you computer allows downloads from this site.
After the application has been installed, an application icon should appear on your desktop. Double click the SSH Secure Shell Client application icon to run this application.
![]()
- The main SSH Client window will appear. Let's learn how to connect to and login to our Matrix account using this graphical SSH application.

- Click on the Quick Connect button.
NOTE: The Connect dialog box allows the user to specify the server name and your account name to allow you to connect to the server.

Click on the textbox labelled Hostname and enter the text: matrix
- NOTE: You can use the hostname matrix if you are at Seneca Polytechnic. If you where located outside Seneca's network, then you would need to enter the full domain name: matrix.senecapolytechnic.ca
- You will be using the latter hostname since you will be connecting to your Matrix account remotely and not within the college.
Click on the textbox labelled User Name and type your Seneca username (i.e. same as your Seneca userid).
Click the Connect button.
When connecting securely for the first time, a dialog box will appear to share a "public key" with your Matrix account in order to make your interaction between your workstation and the remote Linux server secure within the network (i.e. encrypted to prevent unauthorized access by other users)
- FYI: To make communications over a network secure, a computer generates two keys: a private key that is kept on the computer, and a public key, which can be shared with other computers. Transmissions from your computer uses the private key to encrypt (scramble) transmission to the remote computer, which in turn, uses the public key to decrypt (unscramble) the transmission. Likewise, the remote computer uses the public key to encrypt (scramble) transmissions and your computer uses the private key to decrypt (unscramble) those transmissions.

Dialog Box to Share Public Key on Remote Server ^
Click the Yes button to share your public key.
- NOTE: In subsequent logins to your Matrix account, you may experience a welcome dialog box - simply click OK to proceed.
Next, a dialog box will appear prompting you for your Matrix account password in order to gain entry to your Matrix account. Your Matrix password is identical to your Seneca password. As you type the password, the text will be blocked-out or hidden to prevent others from viewing the screen to obtain your password

Enter your password and click OK or press ENTER
Click OK or press ENTER at the Authentication Response dialog box.

NOTE: If you encounter an error message, this can occur for several reasons:
- You mis-spelled the name of the server
- You mis-spelled your Matrix username (same username that you connect to my.senecacpolytechnic.ca)
- You have CAPS LOCK on by mistake (your username should be lowercase only).
- You mis-spelled your password (same password that you connect to my.senecapolytechnic.ca)

- If you continue to experience the same problems, click on the following link for IT service desk contact info: IT service desk.
If you entered your password correctly and followed all login steps correctly, the SSH Linux shell should appear where you enter Linux commands.
- The Matrix server has been configured to allow users to only interact with the Linux OS by issuing commands. There are various reasons for this, but the main 2 reasons are to force students to learn how to issue Linux commands as well as limitations to remote access to a graphical Linux server due to large number of users (students).

Configuring your Graphical Windows SSH Application
You can configure the SSH application to adjust elements such as the window size and text font type and text font size.
We will be showing you how to configure just your SSH Secure Shell Client (FYI: other SSH applications available in the Week 1 reference section also have the ability to configure settings).
Perform the Following Steps:
- Click on the Edit menu item, and then select Settings in the Edit drop-down menu.

To change the size of your shell window, under the Global Settings section, click Appearance
Change the window size both horizontal and vertical to larger values.
To change the font size, under the Global Settings section, click Font
Select a larger font size and click OK
You now should notice that you have customized your SSH shell terminal. You can use the settings screen to also change your background and text colours if you are interested in doing so.
Try moving your mouse pointer to the bottom right-hand corner of the SSH application window, then click and drag outwards to make the application window larger.
To exit your Matrix session, type the command
exitand then press ENTER- NOTE: You should notice that the colour of the text changes slightly when disconnected and you are unable to issue Linux commands from that window.
After you have disconnected from your account, close the SSH Secure Shell Client application window.
- NOTE: You are STRONGLY ADVISED to use the exit command to properly terminate your Matrix session PRIOR to closing the SSH or terminal application window!
In the next investigation, you will learn how to issue Linux commands from the command prompt (referred to as the "shell"), issue a checking program to confirm that you logged into your Matrix account
Investigation 2: Using The Linux Shell
In this investigation, you will learn how to use the Linux Shell. Topics in the section include:
- Learn the basic Linux command structure (arguments and options)
- Learn how to get help for Linux commands via the online manual (i.e. man command).
- Perform Basic Shell Editing
- Issue a program to confirm that you connected to your Matrix account
Part 1: Using the Linux Shell
The Bash shell in Matrix allows you to interact with your Matrix account by issuing commands.
The General Linux Command Structure is as follows:
command argument1 argument2 ...
Some Linux commands can be used as-is (e.g. pwd, date, ls, cal), but many Linux commands can also be issued with arguments (e.g. cal 2002, cd /bin, ls -l -a /bin).
What Does an Argument Represent?
An argument can respresent:
A command option.
- Example:
-l
- Example:
A file pathname.
- Example:
/etc
- Example:
A series of characters (i.e. text) that the command can use.
- Example:
"Hello, world."
- Example:
An argument must be separated from a command (or from other arguments) by whitespace (a SPACE, MULTIPLE SPACES or a TAB).
Perform the Following Steps:
- Make certain that you are logged into your Matrix account.
- Issue the following Linux command:
pwd
- Explanation: The output from this Linux command shows your current location on the Matrix server (otherwise known as your Present Working Directory). This represents a directory pathname to your home directory. We will discuss pathnames later in this course.
- Issue the following Linux command:
ls
- Question: What do you notice?
- Answer: If there are any files in your home directory, only their file names are displayed.
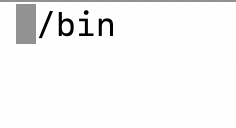
- Change your directory location by issuing the following command:
cd /bin
- Issue the following Linux command to confirm your changed current location:
pwd
- Issue the following Linux command again:
ls
- Question: What do you notice?
- Re-run the ls command using an option:
ls -l
- Question: What do you notice?
- Answer: The -l option with the ls command displays a detailed ("long") listing of the same files, providing you with more information about each file. This is called metadata (data about data), and includes information such as last modified date, file size, ownership and permissions.
- Return to your home directory:
cd
- Now confirm you've changed back to your home directory:
pwd
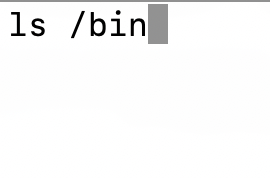
- Issue the following Linux command:
ls /bin
- Issue the following Linux command to confirm your current location:
pwd
- Question: What do you notice?
- Question: What makes this command with that argument useful if you are currently located in your home directory?
Issue a Linux command that you have already learned to change to your home directory and to confirm that you have returned to your home directory.
Issue the following Linux command:
clear
- Question: What do you notice? Why is this command helpful?
- Tip: The shortcut keys to clear the screen for the Bash shell are:
ctrl-l
- Issue the following Linux command:
who
- Question: What information does this command show?
- Answer: This command lists users that are logged into the same Linux server as yourself.
- NOTE: Remember that the Matrix Linux cluster contains several servers (or nodes). It won't display all users logged into the cluster, only the ones on the same node as you.
- Issue the following Linux command:
whoami
- Question: What does this command display?
- Question: What do you think is the purpose of this command?
- Issue the following Linux command:
cal
- Question: What is the purpose of this command?
- Issue the following Linux command:
cal 2021
- Question: What is the purpose of this command using this argument?
- Issue the following Linux command:
cal 2 2021
- Question: What is the purpose of this command using those two numbers as arguments?
Getting Help with Linux Commands
With the Linux OS containing over 2500 commands and utilities, it's important for Linux users and Linux system administrators (sysadmin) to learn how to use commands “on-the-fly”.
The man utility is an interactive collection of manual pages that provides information on how to use a given command (i.e. command usage, acceptable command arguments, command options, examples).
Issue the following command for the manual page about the manual utility:
man man- You may notice that the online manual categories commands into sections or numbered volumes.
Press the SPACE key to move to the next screen.
- Question: How many volume numbers are contained in the man pages (like executable commands, games, or system administrator commands)?
You can use the following shortcut keys within the man command to help navigate throughout this utility to get help with the ls command (refer to table below):
Keyboard Shortcut Purpose ENTER Move down one line SPACEBAR Move one screen down <ctrl><b> Move one screen up /pattern/ Search for Pattern q quit man utility Press the
qkey to exit the man command.Issue the following Linux command to use the man utility to get help with the ls command:
man ls
Navigate through the ls manual page and write down the option letters that correspond to the following descriptions:
- "use a long listing format"
- "do not ignore entries starting with ." (i.e. hidden files)
- "sort by file size"
- "append indicator (one of */=>&|) to entries" (i.e. type of file)
Exit the man utility for the ls command.
Issue the
lscommand using each of those option letters you noted in step 6 to see how the command's output changes with each option.- NOTE: The man utility can be used with the -k option to help list Linux commands that match a text pattern that is contained within the help screen for a Linux command.
Pipeline commands can be used to filter-out unnecessary output. In the next command that you will be issuing, the output from the man -k command, is sent into the grep command to filter (i.e. trap) only output that matches the pattern "8" (The number "8" refers to the category of type of command - in this case, administration commands). We will learn more about pipeline commands later in this course.
Issue the following Linux pipeline command:
man -k user | grep 8
- Question: How does this pipeline command make it easier to obtain information regarding man command?
- If you wish to change your password on typical Linux systems, you can by issuing the command:
passwd
WARNING: Do NOT run the passwd command on Matrix!
Unique to this college, your Linux password is changed automatically when you change your myseneca password.
- Question: What option for the passwd command can be used to change user info (such as name)?
- Hint: use the man command for passwd.
- Press the
qkey to exit the man command.
You will now learn how to perform command line editing to correct syntax errors while typing Linux commands PRIOR to pressing the ENTER key.
Command Line Editing
Learning shortcut keys in any OS terminal will allow you to be more productive as a Linux user or Linux System Administrator (commonly referred to as: Linux sysadmin).
| Shortcut Key(s) | Purpose |
|---|---|
| <ctrl><l> | Clear Screen |
| <ctrl><u> | Clear Command Line |
| <Up Arrow>, <Down Arrow> | Scroll Up / Down Command History |
| <backspace>, <ctrl><backspace>, <ctrl><h> | Delete character before cursor |
| <ctrl><w> | Delete word before the cursor |
| <ctrl><a> | Move word before the cursor |
| <ctrl><e> | Move cursor to end of command line |
| <alt>f / <alt>b (Mac: OPTION+Right/Left-Arrow) | Move Forward/Backward one word |
Let's learn a few common Bash Shell keyboard shortcut keys and find out where you can access online help for additional shortcuts (if required).
Perform the Following Steps:
- Type the following Linux command, but DON’T press the ENTER key:
cd /bin
Press the
ctrl-akey combination. What happens?- NOTE: To make alt-f key work when use the GRAPHICAL Windows SSH Client application, select Edit -> Settings -> Keyboard, and select the checkbox Use ALT as Meta key (and Escape).
.")
- Press the
alt-fkey combination two times
(OPTION+right-arrow for Mac OSx).
- Press the
alt-bkey combination one time.
(OPTION+left-arrow for Mac OSx).

alt-b moves one word backwards for Windows OS
Press the
ctrl-wshortcut key.What happens?
ctrl-w deletes a word to left of the cursor.
Type the following command:
ls
- After command is deleted, then type new command and press ctrl-e to move to end of the command line.
Press the
ctrl-ekey combinationWhat happens?
Press the
ENTERkey to execute the command.Press the
up arrowkey. What happens?Press the
ctrl-ukey combination. What happens?Press the
up arrowkey combination, and see what happens when you pressBACKSPACE,<ctrl><BACKSPACE>and<ctrl><h>.- Why is it important to know those series of key combinations?
Press the
ctrl-ukey combination to clear the line.Press the
ctrl-lkey combination. What happens? What is the advantage of using ctrl-u as opposed to ctrl-l?
The Bash shortcut keys that you just learned are sufficient to perform Bash Shell editing. Although you are NOT required to learn other short-cut keys, here is a link to a listing in case you are interested: https://ostechnix.com/list-useful-bash-keyboard-shortcuts/
Tutorial Submission
Running a Shell Script to Check Student Online Tutorial Participation
Professors will require students successfully perform these online tutorials for marks (within a deadline). In order to confirm that you successfully performed a tutorial, you will be required to run a program (or in later tutorials, several programs) to prove that you successfully completed tasks in a tutorial and get marks.
These programs (known as Shell Scripts) will check your work and offer feedback if you made mistakes, so you can make corrections. Making corrections (i.e. troubleshooting) and re-running these checking programs until you are successful will help students gain "hands-on" experience as well as "trouble-shooting experience.
If you have correctly completed the required tasks, the user can proceed.
If the checking shell script detects an error, then it will provide feedback to allow the student to fix that problem so they can re-run the checking shell scripts until they have successfully completed a task.

Perform the Following Steps:
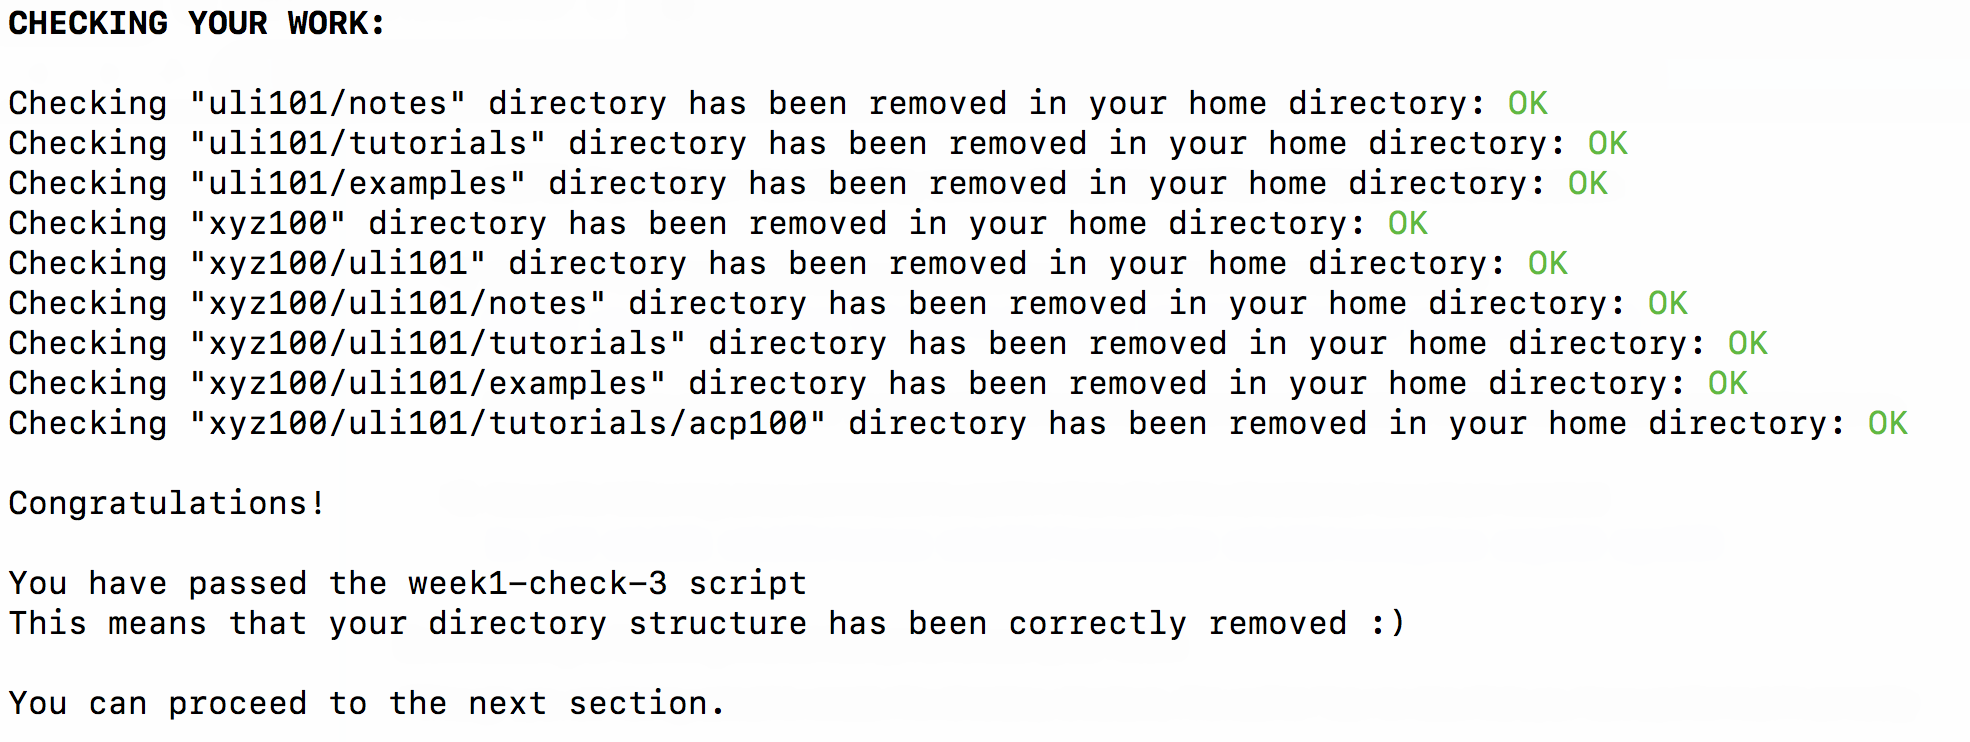
- Make certain that your current directory is your home directory by entering the following Linux command:
cd
- Issue the following command to run a checking script:
~osl640/week1-check
- Note: The beginning character "~" is called tilde. You get this character by pressing SHIFT + ` (which is the key to the left of the number 1 on your keyboard).
Your screen should clear and indicate that you have proved that you have successfully logged in.
An email will be sent to your Seneca email as confirmation that you have completed this tutorial in case your OSL640 professor is assigning marks to these tutorials.
- Keep those confirmation email messages for the duration of this semester as proof that you have completed those checking scripts in case there is a discrepancy in tutorial grades.
Linux Practice Questions
The purpose of this section is to obtain extra practice to help with quizzes, your midterm, and your final exam.
Here is a link to a MS Word document of ALL of the questions displayed below but with extra room to answer on the document to simulate a quiz
Your instructor may take-up these questions during class. It is up to the student to attend classes in order to obtain the answers to the following questions. Your instructor will NOT provide these answers in any other form (eg. e-mail, etc).
Review Questions:
- What is a “Linux Cluster”? What is an advantage of using a Linux cluster?
- List three unique server names at Seneca college and briefly explain the purpose of that server.
- List the steps to connect and login to your Matrix Seneca College account on your laptop or your home computer.
- List alternative methods to connect to your Matrix account, including if you have an Apple Mac computer or are running the Linux operating system.
- List 3 unique ways to log-out of your Matrix account (not including closing the SSH window or application).
- What is the difference between a Linux command and an argument?
- What is the purpose of a Linux command option?
- What character(s) are used to separate commands and arguments?
- Create a table listing each Linux command, useful options that were mentioned in this tutorial for the following Linux commands:
pwd,cd,ls,cal,date,who,w,whoami,who am I,clear