Lab 8 - DNS & SSL
Overview
This week's lab will cover the following:
- Using a service to register a domain name
- Generating TLS/SSL certificates with Let's Encrypt & Certbot
- Configuring https on your Apache web server
Registering a domain name
You should have received an email indicating you have access to My.Custom.Domain. You will be using this to create an A record and map it to the elastic IP of your instance from Lab 7. If you do not have access please contact your professor so you can proceed.
Creating an A record
Login to My.Custom.Domain. You should see a screen similar to the one below.

Click Create DNS Records.
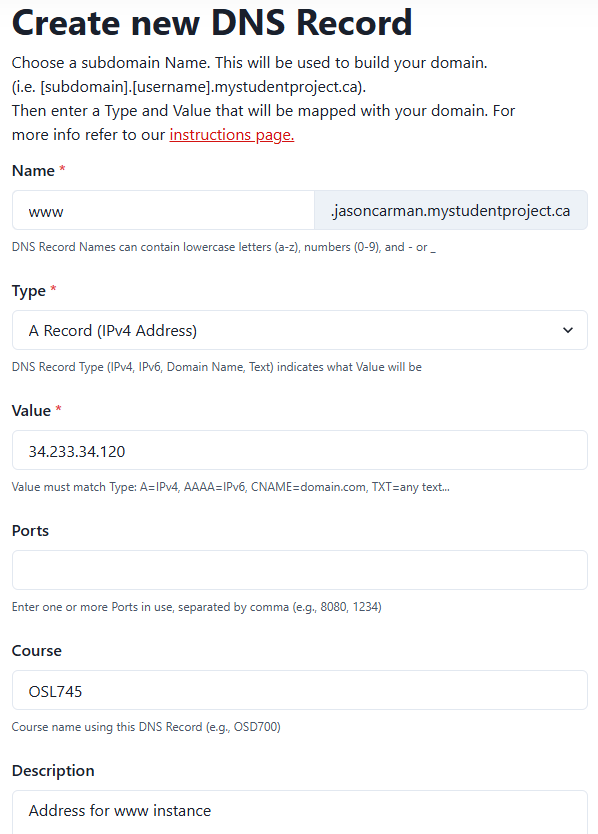
On the following screen, click Create your first DNS Record!, and fill in the following information (see the following screenshot for an example)
- Name: www
- Type: A Record (IPv4 Address)
- Value: your elastic IP
- Course: OSL745
- Description: Address record for www instance.
Click Create.
Testing Your DNS configuration
- Launch the AWS Learner Lab and login. Make sure your www instance is running.
- Next, login to your first instance and issue the following commands. Note the output of each. Substitute your username in the provided commands.
nslookup www.yourusername.mystudentproject.ca
and
dig www.yourusername.mystudentproject.ca
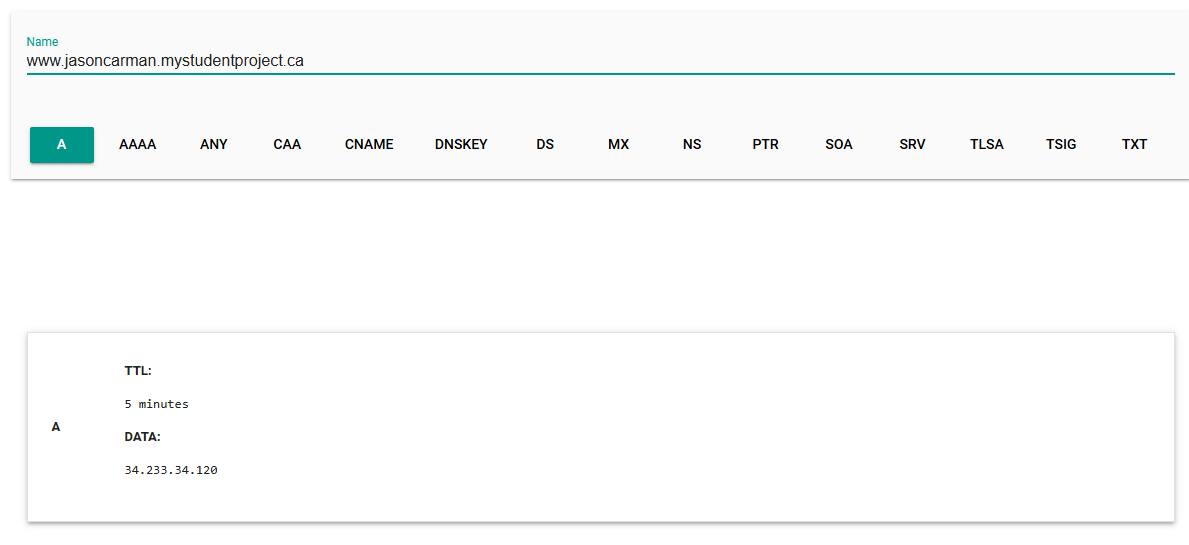
- Access dig via the Google Admin ToolBox and enter the value www.yourusername.mystudentproject.ca into the Name field (make sure the record type is set to A). You should see output similar to the following:
- Provided all of the above displayed the correct output, open a web browser and type www.yourusername.mystudentproject.ca (replace your username) in the URL bar of a web browser. This could be on your PC, or any device. You should see your website from Lab 7! If you don't, double check and make sure you see http:// and not https://.
Make sure you see the correct output from the previous commands indicating your DNS is working before proceeding to the next step.
Note: You can now login via SSH (from the command line) using your FQDN!
Use the command ssh ubuntu@www.username.mystudentproject.ca
Preparing your system to generate and install an SSL certificate
Login to your www instance. You are going to install Certbot, which will automate configuring HTTPS using Let's Encrypt.
Installing Certbot
First, check to see if it is available by issuing the following command.
sudo apt search certbot
You should see the following output.
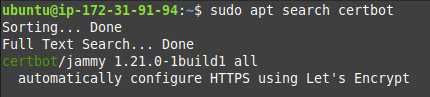
Once you have confirmed it is available, install it.
sudo apt -y install certbot python3-certbot-apache
Configuring an Apache Virtual Host
Create the and edit a file for your virtual host configuration. You can use either vi or nano. Replace wwwusernamemystudentprojectca with your domain name, with the www and top level domain, but without the dots(.). This will allow Certbot to find the correct VirtualHost block and update it.
sudo nano /etc/apache2/sites-available/wwwusernamemystudentprojectca.conf
Enter the following text (again, replacing the username with yours).
ServerName www.jasoncarman.mystudentproject.ca
Testing and Reloading the Apache configuration
Enter the following command to test your Apache configuration.
sudo apache2ctl configtest
You should see a message indicating Syntax OK. If you don't, double check your file name and contents for errors. Sample output follows.
![]()
Now you can reload apache2 using systemctl.
sudo systemctl reload apache2
Generating an SSL certificate using Let's Encrypt and Certbot
Now you are ready to generate your SSL certificate using Certbot. You are going to configure Apache to reconfigure and reload the configuration whenever necessary. This way you do not need to worry about updating your SSL certificate every 90 days, which is when certificates issued through Let's Encrypt and Certbot expire. Issue the following command:
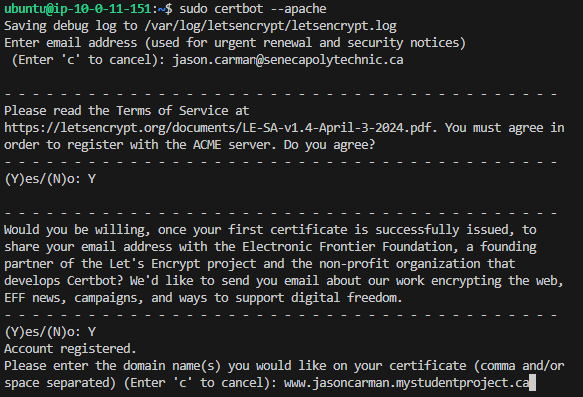
sudo certbot --apache
At the email address prompt, enter your Seneca Polytechnic issued email.

Accept the terms of service. Answer as you wish for sharing your email, then enter your domain name. See the following example.
Update your Wordpress Website SG security group rules to allow incoming HTTPS traffic from the anywhere IP: 0.0.0.0/0
Testing your configuration
Open a web browser try to access your Apache test page using HTTPS. It should work!
Lab 8 Sign-Off (Show Instructor)
Show your professor the following:
- Your Elastic IP
- Accessing your Apache2 Ubuntu Default Page through a web browser using https
Exploration Questions
- What port did you have to allow inbound in the Wordpress Website SG security group?